Gabi is one of the major rootcrops grown throughout the country. It can be grown almost anywhere, upland or lowland. Land preparation and planting: 1. Plow the field twice to loosen the soil. 2. Harrow the field in a criss-cross manner to break the soil clods. 3. Make furrows at a distance of 75 cm. [&hellip
↧
How to Grow Gabi
↧
Sweet sorghum planter Bapamin eyes to produce popular American snack granola bar using nutritious sweet sorghum grains

 Photo by Swathi_Sridharan
  [/caption]
A snack bar that traditionally uses temperate-growing oats, the granola bar planned to be produced by Bapamin will use sweet sorghum grains that are already locally available. Sweet sorghum is known as a climate smart crop. Bapamin runs a 24-hectare sweet sorghum farm in Batac, Ilocos Norte.
“Instead of granola, it uses sweet sorghum grains which is a nutritious food. It’s easy to produce sweet sorghum in areas with irrigation problems (like in Ilocos). We have to adapt to our climate, and it’s really a good alternative to rice,” said Doris Arcangel of Bapamin.
Snack bars have a huge potential market as these are a substitute to rice-based products. Granola bars are an alternative food to rice and to breakfast cereals that use corn in flakes, oats, wheat, or rye.
Traditional granola bars are made of pressed oats, nuts, and honey.
Bapamin is already producing food products from sweet sorghum. These are sweeteners, vinegar, cookies, and it is testing food preparations as diet for certain hospital patients.
Given further research and development, Bapamin may decide to produce the granola bar under a technology incubation program (TBI) of the DA, the Bureau of Agricultural Research (BAR), and the International Crops Research Institute of the Semi Arid tropics (ICRISAT.
The company has earlier obtained its superior sweet sorghum varieties under a DA-BAR program as developed by ICRISAT.
As a value-adding program, ICRISAT and DA-BAR may further assist Bapamin in the granola production.
“We’ve already identified manufacturers to supply food processing equipments to Bapamin. It’s very much possible for us to link Bapamin to these manufacturers,” said Dr. Saikat Datta Mazumdar, chief operating officer of ICRISAT’s Agribusiness and Innovation Platform (AIP).
BAR Director Nicomedes P. Eleazar said BAR has the mandate to help agriculture-based technologies like that of sweet sorghum products so these may be released to the market on a commercial scale.
“BAR is open to international partnerships as with ICRISAT which has long been its collaborator in many climate crops that are now successfully used in the Philippines,” according to Eleazar.
Sweet sorghum is a good substitute to sugarcane as it has been found to be low-glycemic under an earlier BAR-funded program. It is recognized as climate smart as it uses less water using just around 20-25 percent of the water required to grow sugarcane.
It can be grown two to three times a year compared to sugarcane which is longer-gestating and is known to have only one cropping per year.
Datta Mazumdar said the NutriPlus Knowledge (NPK) program of ICRISAT-AIP has had a preliminary discussion with Bapamin to incubate (enable business development) of the sweet sorghum-using granola bar.
Preliminary discussions on this incubation program were held between ICRISAT Director General William D Dar and DA Undersecretary Dante S. Delima who led last month a high-level delegation to ICRISAT’s headquarters in Patancheru, Andhra Pradesh, India.
Long distance
In these times of globalization, AIP-ICRISAT does not see distance as a problem in overseeing operation of a company as Bapamin from as far as its Patancheru headquarters.
“I don’t think it’s difficult. If you look at projects we are handling in Africa, most of the equipment are from India, and I don’t think Philippines will be a problem. India has been sending equipment all the way to Africa and the Middle East. I don’t think distance is an issue,” said Datta Mazumdar.
The agribusiness incubator of ICRISAT has commercialized 94 technologies, supported 180 business ventures, and mobilized a total of $18 million investment. It has directly employed 832 and introduced 82 products in the market.
TBI
The technology business incubation partnership with Philippines, in general, may be pursued on a larger scale.
“We may engage in a government to government or institute to institute project. We can transfer our expertise to them,” said Datta Mazumdar.
AIP-ICRISAT’s expertise on helping upgrade a business into a nationally and even globally-relevant trade may further level up operation of local agribusiness startups.
TBI programs have been known to help enable private enterprises to become profitable. TBIs offer startup businesses an integrated help. This includes aid in technology, business administration, laboratory facilities, manpower pool of researchers, scientists, and field specialists, supply of equipment or facilities, and local and global marketing.
Incubators also provide administrative services to startup businesses that enable them to focus on their main business. These are accounting, provision of business office, business registration, quality management, licenses, export-import.
DOST TBI
The Department of Science and Technology (DOST) already has a program on TBI. Through DOST’s Advanced Science and Technology Institute, it has put up a TBI facility on C.P. Garcia Street at the University of the Philippines in Diliman.
This TBI facility has been instrumental to the birth of startup technology businesses including GS Metrix and Itemhound.
However, the Philippines needs more TBIs that will give birth to startup enterprises particularly on food and agriculture.
“AIP-ICRISAT acts as a catalyst for Inclusive Market Oriented Development or IMOD by linking smallholder farmers to different stakeholders across the value chain,” said Dar.
Government fund
The agribusiness incubation program at ICRISAT was established with financial support from the Indian government’s National Science and Technology Entrepreneurship Development Board of the Department of Science and Technology.
Its mission is to “improve well-being of the poor through the creation of competitive agri-business enterprises by technology development and commercialization.”
Funding
A very basic problem of small businesses is funding. The AIP comes in to help startups in this.
A TBI setup in the Philippines like that of the AIP may similarly do brokering to fund a new business.
“If the entrepreneur does not have the fund, we can look for where to find the fund. This service is incorporated into the system,” said Datta Mazumdar. “In our model of sourcing funding, we also have venture capitalists to whom we have linked entrepreneurs.”
In its headquarters in India, AIP-ICRISAT has facilitated funding for an Indian agricultural business with a venture capitalist, Song Investor.
TBI network
AIP-ICRISAT is willing to aid Philippines to set up a network of TBIs.
This network will link farm enterprises with government agencies that have the mandate to help businesses on different concerns. These are financing, agricultural production technologies, processing technologies, post harvest technologies, and marketing.
“We can have an orientation in the Philippines on how to run a business incubator. We can do training in business plan development and management assistance. We can also help bring incubators together--whatever you have there,” said Datta Mazumdar.
AIP-ICRISAT has started helping Africa on TBI setup.
“We have one program on African business incubation that’s going to happen. We will bring their managers together,” he said.
Other technology sectors, not only agriculture, may be incubated under the TBI setup since agriculture needs support systems from other sectors. These may be the information technology or electronics sector.
“By setting up network of incubators, there can be more technologies from different sectors, not just agriculture, not just our crops. It can be on low-end technology like virgin coconut oil and high-end like nanotechnology,” said AIP Deputy Manager Jonathan Philroy.
Fast incubation
With a help from a TBI, incubation of a business becomes fast.
AIP has been instrumental to the incubation of two seed companies that are now present in the Philippines.
Bioseed and Seedworks originated from India. They now supply hybrid corn and vegetable seeds to the Philippines and other South East Asian countries.
“In 2006, I walked in to ICRISAT with just two to three packages of seed. We then became their partner at the agribusiness incubation. We rented a glasshouse from ICRISAT,” said Dr. Dwarkesh Parihar of Bioseed.
Now Bioseed is also in Vietnam, Thailand, Indonesia, Bangladesh, Nepal, Laos, Cambodia.
AIP is based on the concept that innovation and entrepreneurship create prosperity.
“Innovation and entrepreneurship increase wages by creating continuous demand and by competing for human capital, knowledge, and resources. These reduce unemployment, connect local economies to the global economy, facilitate knowledge, and technology transfer,” according to an AIP primer.
Multinational marketing
As with Bioseed, a company can be helped find markets abroad.
“We can find out market conditions, market regulations in another country,” said Philroy.
AIP-ICRISAT has been doing this market linkage for Indian companies that wanted to set up business in Africa.
“Our help here is more on the value chain like one Indian company that’s working on production of sorghum wanted to enter the Kenyan market,” said Philroy. “There was a client that wanted to supply curry leaf and market it in Kenya. We looked at procurement in that part of the world,”
The company, Muarrya Exotica, has been helped on this curry leaf international marketing to Kenya.
Mentoring
Two important services of incubators are mentoring of business managers and networking.
The AIP may also aid Philippines in setting up a network of business incubators and institutions that strengthen technology business incubation.
In India, ICRISAT is part of the National Agricultural Innovation Project (NAIP) which is a network of 22 organizations.
NAIP includes research networks (such as Indian Agricultural Research Institute) and universities (Anand Agricultural University, Tamil Nadu Agricultural University).
AIP’s Innovation & Partnership (INP) put up a food safety laboratory as funded by the government. It houses partners and helped establish their research and development centers. It has organized global events like the AgBioAsia and International Plant Nutrition Conference.
Among its partners are Pioneer-Dupont, Infosys, Galilee Israel, Maryland India Business Roundtable, Centro Internacional Del Papa, EMRC, PRIAS, Hytech Philippines Universiat Marburg, HHTP, MARG, DevGen, Cenbios, University of Pretoria, and ASPA.
Market-oriented
The AIP has been put up by ICRISAT so that innovation from laboratories may become a reality in the commercial world. Businesses should meet the demands of the market.
New products and services are now found in the market through its incubation program.
Nutriplus
The AIP’s Nutriplus program, set up in 2008, was also funded by the Indian government through the state of Andhra Pradesh .
Through post harvest management, food processing, and product development, farmers can become entrepreneurs even if they used to just plant ICRISAT dryland crops. ICRISAT’s major mandate crops are sorghum, pearl millet, groundnut (peanut), chickpea, and pigeonpea (kadyos).
In Africa, AIP has partnerships with the Ministry of Food Processing Industries, Universities, Business and Research In Agricultural Innnovation (UNIBRAIN), Ministry of External Affairs, and FARA.
Nutriplus has food testing laboratories in Nigeria, Gambia, Congo, Zimbabwe, and Rwanda. It has food processing business incubation centers in Ghana, Mali, Uganda, Cameroon,and Angola. The UNIBRAIN is present in Zambia, Uganda, Kenya, Ghana, and Mali.
###
For any questions or interview requests, kindly contact Ms. Analiza C. Mendoza 0921-338-3816, 0916-266-6604
[/caption]
A snack bar that traditionally uses temperate-growing oats, the granola bar planned to be produced by Bapamin will use sweet sorghum grains that are already locally available. Sweet sorghum is known as a climate smart crop. Bapamin runs a 24-hectare sweet sorghum farm in Batac, Ilocos Norte.
“Instead of granola, it uses sweet sorghum grains which is a nutritious food. It’s easy to produce sweet sorghum in areas with irrigation problems (like in Ilocos). We have to adapt to our climate, and it’s really a good alternative to rice,” said Doris Arcangel of Bapamin.
Snack bars have a huge potential market as these are a substitute to rice-based products. Granola bars are an alternative food to rice and to breakfast cereals that use corn in flakes, oats, wheat, or rye.
Traditional granola bars are made of pressed oats, nuts, and honey.
Bapamin is already producing food products from sweet sorghum. These are sweeteners, vinegar, cookies, and it is testing food preparations as diet for certain hospital patients.
Given further research and development, Bapamin may decide to produce the granola bar under a technology incubation program (TBI) of the DA, the Bureau of Agricultural Research (BAR), and the International Crops Research Institute of the Semi Arid tropics (ICRISAT.
The company has earlier obtained its superior sweet sorghum varieties under a DA-BAR program as developed by ICRISAT.
As a value-adding program, ICRISAT and DA-BAR may further assist Bapamin in the granola production.
“We’ve already identified manufacturers to supply food processing equipments to Bapamin. It’s very much possible for us to link Bapamin to these manufacturers,” said Dr. Saikat Datta Mazumdar, chief operating officer of ICRISAT’s Agribusiness and Innovation Platform (AIP).
BAR Director Nicomedes P. Eleazar said BAR has the mandate to help agriculture-based technologies like that of sweet sorghum products so these may be released to the market on a commercial scale.
“BAR is open to international partnerships as with ICRISAT which has long been its collaborator in many climate crops that are now successfully used in the Philippines,” according to Eleazar.
Sweet sorghum is a good substitute to sugarcane as it has been found to be low-glycemic under an earlier BAR-funded program. It is recognized as climate smart as it uses less water using just around 20-25 percent of the water required to grow sugarcane.
It can be grown two to three times a year compared to sugarcane which is longer-gestating and is known to have only one cropping per year.
Datta Mazumdar said the NutriPlus Knowledge (NPK) program of ICRISAT-AIP has had a preliminary discussion with Bapamin to incubate (enable business development) of the sweet sorghum-using granola bar.
Preliminary discussions on this incubation program were held between ICRISAT Director General William D Dar and DA Undersecretary Dante S. Delima who led last month a high-level delegation to ICRISAT’s headquarters in Patancheru, Andhra Pradesh, India.
Long distance
In these times of globalization, AIP-ICRISAT does not see distance as a problem in overseeing operation of a company as Bapamin from as far as its Patancheru headquarters.
“I don’t think it’s difficult. If you look at projects we are handling in Africa, most of the equipment are from India, and I don’t think Philippines will be a problem. India has been sending equipment all the way to Africa and the Middle East. I don’t think distance is an issue,” said Datta Mazumdar.
The agribusiness incubator of ICRISAT has commercialized 94 technologies, supported 180 business ventures, and mobilized a total of $18 million investment. It has directly employed 832 and introduced 82 products in the market.
TBI
The technology business incubation partnership with Philippines, in general, may be pursued on a larger scale.
“We may engage in a government to government or institute to institute project. We can transfer our expertise to them,” said Datta Mazumdar.
AIP-ICRISAT’s expertise on helping upgrade a business into a nationally and even globally-relevant trade may further level up operation of local agribusiness startups.
TBI programs have been known to help enable private enterprises to become profitable. TBIs offer startup businesses an integrated help. This includes aid in technology, business administration, laboratory facilities, manpower pool of researchers, scientists, and field specialists, supply of equipment or facilities, and local and global marketing.
Incubators also provide administrative services to startup businesses that enable them to focus on their main business. These are accounting, provision of business office, business registration, quality management, licenses, export-import.
DOST TBI
The Department of Science and Technology (DOST) already has a program on TBI. Through DOST’s Advanced Science and Technology Institute, it has put up a TBI facility on C.P. Garcia Street at the University of the Philippines in Diliman.
This TBI facility has been instrumental to the birth of startup technology businesses including GS Metrix and Itemhound.
However, the Philippines needs more TBIs that will give birth to startup enterprises particularly on food and agriculture.
“AIP-ICRISAT acts as a catalyst for Inclusive Market Oriented Development or IMOD by linking smallholder farmers to different stakeholders across the value chain,” said Dar.
Government fund
The agribusiness incubation program at ICRISAT was established with financial support from the Indian government’s National Science and Technology Entrepreneurship Development Board of the Department of Science and Technology.
Its mission is to “improve well-being of the poor through the creation of competitive agri-business enterprises by technology development and commercialization.”
Funding
A very basic problem of small businesses is funding. The AIP comes in to help startups in this.
A TBI setup in the Philippines like that of the AIP may similarly do brokering to fund a new business.
“If the entrepreneur does not have the fund, we can look for where to find the fund. This service is incorporated into the system,” said Datta Mazumdar. “In our model of sourcing funding, we also have venture capitalists to whom we have linked entrepreneurs.”
In its headquarters in India, AIP-ICRISAT has facilitated funding for an Indian agricultural business with a venture capitalist, Song Investor.
TBI network
AIP-ICRISAT is willing to aid Philippines to set up a network of TBIs.
This network will link farm enterprises with government agencies that have the mandate to help businesses on different concerns. These are financing, agricultural production technologies, processing technologies, post harvest technologies, and marketing.
“We can have an orientation in the Philippines on how to run a business incubator. We can do training in business plan development and management assistance. We can also help bring incubators together--whatever you have there,” said Datta Mazumdar.
AIP-ICRISAT has started helping Africa on TBI setup.
“We have one program on African business incubation that’s going to happen. We will bring their managers together,” he said.
Other technology sectors, not only agriculture, may be incubated under the TBI setup since agriculture needs support systems from other sectors. These may be the information technology or electronics sector.
“By setting up network of incubators, there can be more technologies from different sectors, not just agriculture, not just our crops. It can be on low-end technology like virgin coconut oil and high-end like nanotechnology,” said AIP Deputy Manager Jonathan Philroy.
Fast incubation
With a help from a TBI, incubation of a business becomes fast.
AIP has been instrumental to the incubation of two seed companies that are now present in the Philippines.
Bioseed and Seedworks originated from India. They now supply hybrid corn and vegetable seeds to the Philippines and other South East Asian countries.
“In 2006, I walked in to ICRISAT with just two to three packages of seed. We then became their partner at the agribusiness incubation. We rented a glasshouse from ICRISAT,” said Dr. Dwarkesh Parihar of Bioseed.
Now Bioseed is also in Vietnam, Thailand, Indonesia, Bangladesh, Nepal, Laos, Cambodia.
AIP is based on the concept that innovation and entrepreneurship create prosperity.
“Innovation and entrepreneurship increase wages by creating continuous demand and by competing for human capital, knowledge, and resources. These reduce unemployment, connect local economies to the global economy, facilitate knowledge, and technology transfer,” according to an AIP primer.
Multinational marketing
As with Bioseed, a company can be helped find markets abroad.
“We can find out market conditions, market regulations in another country,” said Philroy.
AIP-ICRISAT has been doing this market linkage for Indian companies that wanted to set up business in Africa.
“Our help here is more on the value chain like one Indian company that’s working on production of sorghum wanted to enter the Kenyan market,” said Philroy. “There was a client that wanted to supply curry leaf and market it in Kenya. We looked at procurement in that part of the world,”
The company, Muarrya Exotica, has been helped on this curry leaf international marketing to Kenya.
Mentoring
Two important services of incubators are mentoring of business managers and networking.
The AIP may also aid Philippines in setting up a network of business incubators and institutions that strengthen technology business incubation.
In India, ICRISAT is part of the National Agricultural Innovation Project (NAIP) which is a network of 22 organizations.
NAIP includes research networks (such as Indian Agricultural Research Institute) and universities (Anand Agricultural University, Tamil Nadu Agricultural University).
AIP’s Innovation & Partnership (INP) put up a food safety laboratory as funded by the government. It houses partners and helped establish their research and development centers. It has organized global events like the AgBioAsia and International Plant Nutrition Conference.
Among its partners are Pioneer-Dupont, Infosys, Galilee Israel, Maryland India Business Roundtable, Centro Internacional Del Papa, EMRC, PRIAS, Hytech Philippines Universiat Marburg, HHTP, MARG, DevGen, Cenbios, University of Pretoria, and ASPA.
Market-oriented
The AIP has been put up by ICRISAT so that innovation from laboratories may become a reality in the commercial world. Businesses should meet the demands of the market.
New products and services are now found in the market through its incubation program.
Nutriplus
The AIP’s Nutriplus program, set up in 2008, was also funded by the Indian government through the state of Andhra Pradesh .
Through post harvest management, food processing, and product development, farmers can become entrepreneurs even if they used to just plant ICRISAT dryland crops. ICRISAT’s major mandate crops are sorghum, pearl millet, groundnut (peanut), chickpea, and pigeonpea (kadyos).
In Africa, AIP has partnerships with the Ministry of Food Processing Industries, Universities, Business and Research In Agricultural Innnovation (UNIBRAIN), Ministry of External Affairs, and FARA.
Nutriplus has food testing laboratories in Nigeria, Gambia, Congo, Zimbabwe, and Rwanda. It has food processing business incubation centers in Ghana, Mali, Uganda, Cameroon,and Angola. The UNIBRAIN is present in Zambia, Uganda, Kenya, Ghana, and Mali.
###
For any questions or interview requests, kindly contact Ms. Analiza C. Mendoza 0921-338-3816, 0916-266-6604
↧
↧
How to Make Soil Conditioners for Urban Gardening

 By applying soil conditioner, Nilo grows sweet corn and vegetables- like lettuce, pechay, mustasa, sili, tomatoes, eggplants, alugbati, lemongrass, saluyot, pandan, Chinese kangkong, camote tops, ginger, luyang dilaw, malunggay- and herbs- like sweet basil, tarragon, oregano, sambong, damong mais and tawa-tawa- in plastic cans, bottles or styropors.
After Nilo F. Estrella learned the technology during the urban gardening seminar conducted by Dr. Lino Cortez and Manuel Cortez in 2007, he conducted his own research and developed his own models.
First Model: Production and Application of a Potent Lactobacilli Solution as a Soil Conditioner and Foliar Spray. It is done by producing Effective Microorganisms (EMO) through fermentation.
How to Make It:
1. Mix the rice wash and kitchen refuse, then fill 1/4 of a plastic container with the mixture and let it stand for a week.
2. After that, dispose the thin-film like substance that developed on top of the fermented mixture. Set aside half of the mixture then add ten parts of evaporated milk and one part molasses or brown sugar with the other half. Cover the container with cloth and let it stand for a week in a cool and well-ventilated place.
3. The fermentation will be complete after a week. The lactobacilli in the milk have killed the harmful microorganisms in the mixture.
How to Use:
Mix 45ml or about 3 tbsps. of the concoction with 16 liters of water then spray it to the soil regularly. When it is applied as foliar spray, sprinkle the plants with water afterwards to prevent after effects according to Nilo Estrella.
Second Model: Propagation of Indigenous Microorganism (IMO) through Fermentation.
Nilo uses cooked rice as substrate in collecting airborne microorganisms.
How to Make It:
1. Fill 1/4 of a plastic container with rice and allow it to stand for a week. By this time molds have appeared on the upper portion of the rice. Scrape these and put in another container that is 3/4 full of a mixture of water, molasses and milk.
2. Cover the container with clean cloth and let it stand for a week when fermentation is complete.
How to Use it:
Mix 45ml or about 3 tbsps. of the IMO concoction with 16 liters of water then spray it to soil and plants.
Third Model: Production and Application of Vermicast as a source of nitrogen, phosphorous and potassium.
How to Make It:
Feed the leaves of plants rich in nitrogen and kitchen refuse to African nightcrawler earthworms to produce vermicast. Then the vermicast, also known as worm castings, worm humus or worm manure can be added to soil containers to sustain the growth of vegetables.
How to Make Pesticide:
1. Nilo mixes with water two of any of the following: chopped hot pepper, garlic, onions, lemon grass, oregano, ginger and leaves of neem tree, makabuhay, or kakawate. Spray the solution as pesticide.
Source: Pete Samonte (2010). Making Soil Conditioners for Urban Gardening. Agriculture Magazine
By applying soil conditioner, Nilo grows sweet corn and vegetables- like lettuce, pechay, mustasa, sili, tomatoes, eggplants, alugbati, lemongrass, saluyot, pandan, Chinese kangkong, camote tops, ginger, luyang dilaw, malunggay- and herbs- like sweet basil, tarragon, oregano, sambong, damong mais and tawa-tawa- in plastic cans, bottles or styropors.
After Nilo F. Estrella learned the technology during the urban gardening seminar conducted by Dr. Lino Cortez and Manuel Cortez in 2007, he conducted his own research and developed his own models.
First Model: Production and Application of a Potent Lactobacilli Solution as a Soil Conditioner and Foliar Spray. It is done by producing Effective Microorganisms (EMO) through fermentation.
How to Make It:
1. Mix the rice wash and kitchen refuse, then fill 1/4 of a plastic container with the mixture and let it stand for a week.
2. After that, dispose the thin-film like substance that developed on top of the fermented mixture. Set aside half of the mixture then add ten parts of evaporated milk and one part molasses or brown sugar with the other half. Cover the container with cloth and let it stand for a week in a cool and well-ventilated place.
3. The fermentation will be complete after a week. The lactobacilli in the milk have killed the harmful microorganisms in the mixture.
How to Use:
Mix 45ml or about 3 tbsps. of the concoction with 16 liters of water then spray it to the soil regularly. When it is applied as foliar spray, sprinkle the plants with water afterwards to prevent after effects according to Nilo Estrella.
Second Model: Propagation of Indigenous Microorganism (IMO) through Fermentation.
Nilo uses cooked rice as substrate in collecting airborne microorganisms.
How to Make It:
1. Fill 1/4 of a plastic container with rice and allow it to stand for a week. By this time molds have appeared on the upper portion of the rice. Scrape these and put in another container that is 3/4 full of a mixture of water, molasses and milk.
2. Cover the container with clean cloth and let it stand for a week when fermentation is complete.
How to Use it:
Mix 45ml or about 3 tbsps. of the IMO concoction with 16 liters of water then spray it to soil and plants.
Third Model: Production and Application of Vermicast as a source of nitrogen, phosphorous and potassium.
How to Make It:
Feed the leaves of plants rich in nitrogen and kitchen refuse to African nightcrawler earthworms to produce vermicast. Then the vermicast, also known as worm castings, worm humus or worm manure can be added to soil containers to sustain the growth of vegetables.
How to Make Pesticide:
1. Nilo mixes with water two of any of the following: chopped hot pepper, garlic, onions, lemon grass, oregano, ginger and leaves of neem tree, makabuhay, or kakawate. Spray the solution as pesticide.
Source: Pete Samonte (2010). Making Soil Conditioners for Urban Gardening. Agriculture Magazine
↧
Study examines genetic diversity of Arakan Valley’s indigenous upland rice

Studying the upland rice in Arakan Valley
In Cotabato lies what is considered as the upland “rice belt” called Arakan Valley where a number of indigenous upland rice are thriving. With support from the Bureau of Agricultural Research, a study was initiated by Dr. Juliet Bangi of the University of the Philippines-Natural Sciences Research Institute (UP-NSRI) in cooperation with the local government unit of Arakan through the Municipal Agriculture Office, Manobo Lumadnong Panaghiusa (MALUPA) of Arakan, Cotabato, and SEARICE, an NGO helping the Manobo tribal community in Arakan Valley Complex.
The study seeks to determine the desirable rice gene characteristics through morphogenetic characterization and analysis of the genetic diversity of the indigenous upland rice in the valley. Understanding the structure and diversity of indigenous rice is needed by our scientists and researchers in the conservation and preservation of genetic resources that have potential uses for future breeding purposes.
In the study, 14 indigenous upland rice were collected from local farmers. These include Azucena, Dinorado, Mal-os, Magalitok, Kapalawan, Mubpon, Manisi, Bungulan, Kawilan, Malundiang, Sinulid, Ulipapa, Dabao, and Hinumay. They were subjected under laboratory and greenhouse experiments to characterize their seeds and plant structure. These include plant height, number of tillers per plant, number of days to flowering, number of panicles per plant, panicle length, and 1,000-grain weight.
Results showed that the indigenous upland rice is highly diverse with desirable characteristics. Among those studied, the tallest plants are the Azucena and Hinumay. Meanwhile, Kawilan had the highest number of tillers per plant as well as the panicles produced, and the Malundiang had the earliest flowering period. The longest panicle was produced by Magalitok, and Ulipapa and Bungulan had the heaviest 1,000-grain weight.
Meanwhile, in analyzing the genetic diversity of the rice, one of the most powerful tools used by scientists is through DNA markers. The study particularly used the simple sequence repeats (SSR) which are also called microsatellites. Among the DNA markers, SSRs are found to be the most efficient and cost-effective tool that can detect higher degree of polymorphisms in rice.
The study revealed that Malundiang and Ulipapa have 30-50 percent associated genes that possess the desirable qualities of being early-maturing and having high yield potential. Bungulan, Mubpon, Sinulid, and Mal-os have diverse genes, and are found to have desirable genetic makeup based from their morphogenetic characteristics. Bungulan, Manisi, Kapalawan, Magalitok, Sinulid, Mal-os, and Dinorado have varied and narrow genetic distance indicative of having distinct genes. With a dissimilarity index of 3.32, Kawilan and Kapalawan are upland rice with different genes.
These reflect the diversity of the indigenous upland rice in the Arakan Valley Complex based on their genetic makeup, and those that were studied are part of the genetic pool of resources in the locality. High-yielding varieties with promising potentials may emerge in the future as breeding efforts using our indigenous upland rice result in the successful improvement of grain quality, resistance to pests and diseases, and reduction in the maturity period, among many others. If effectively managed and used, they would be substantial in meeting the ever-increasing demand for food as the future unfolds. ### (Anne Camille B. Brion)
----------
For more information about the study, you may contact Dr. Juliet Bangi through (02) 981 8500 loc. 3611. Dr. Juliet Bangi is a post-doctoral fellow of the DA-BAR/UP-NSRI Post-Doctoral and Senior Scientist Research Fellowship in Basic Research in Agriculture and Fisheries.
Source and image: bar.gov.ph
↧
Oil Palm Farming

 Recently, many farmers asked me what is the best crop to plant. With my experience as a farmer and agricultural technician and consultant, my first choice is oil palm, and I suggest that small landholders with only 3 to 5 hectares should plant a part of or their Whole farm to this crop. For one, compared to coconut, oil palm is easy to plant and maintain as it does not require much time for maintenance, harvesting and even marketing. For another, oil palm has many comparative advantages over other crops.
Similar to the best hybrid corn, oil palm H hybrid grows fast and is very sturdy once planted in the field. Oil palm trees are greener in weedy fields, where coconut trees may appear chlorotic due to weed competition.
Also, oil palm is not prone to damage by moderate drought or floods once established compared to possible extensive damage on field crops, lansones, duriam and other fruit trees. And compared to coconuts, oil palm trees are more profitable as it has much higher yield and income.
Moreover, one need not cultivate the grass fields or burn the cut second growth forest trees to successfully plant oil palm trees. Just let the forest trees decay as organic fertilizer for oil palm trees. I have tried this, and I successfully planted 5-hectare gmelina-logged-over farm without cultivation
Few maintenance activities are needed in oil palm farming compared to fruit farming, which requires time-demanding activities like pruning, irrigation and pesticide spraying, and to banana production, which needs weekly leaf pruning, monthly fertilization and desuckering.
Oil palm can thrive in flat upland plains and in hilly lands with less than 18° slope. It can also grow in newly drained swampy areas and drained lowland ricefields. It also does not require extensive drainage canals as in Cavendish or Lakatan banana farming.
Most oil palm hybrids are highly productive at lower elevations of not more than 500 meters above sea level (MASL) much similar to the elevation requirements of mango, pummelo, and other tropical tree crops. But there are new oil palm hybrids which are suitable for higher elevations of up to 1,000 MASL, where many tropical crops, including fruit and rubber trees are no longer suitable. This offers the opportunity for oil palm to be used in reforesting the denuded and cogonal high-lands to make these lands productive.
Oil palm trees produce the first commercial quantity of fruit bunches in just two years (or up to 28 months) after planting. So for farmers to cam within a year, they might as well intercrop oil palm with rice, corn, vegetables, peanut, or legumes. It can also be intercropped with lakatan banana and pineapple.
Oil palm farming is also a good investment. Because unlike coconut trees and many fruit trees which come to bearing on the average of Oil palm has fewer pest and disease problems compared to rice, corn, vegetables, and other high-value crops. Likewise, oil palm only requires minimal amount of pesticides.
For instance, mango needs six to seven pesticide sprays during fruiting season, so as with durian and more so with pummel°, which requires 10 to 12 sprayings from flowering to fruit development against rind borer. With Cavendish and Lakatan banana, such requirement is doubled; they need 22 sprayings of fungicides and insecticides per year!
Mature oil palm trees also require lesser amount of fertilizer compared to commercial hybrid corn and banana. They only need 18 bags of fertilizer per year. If supplemented with organic fertilizer, they would only need 10 bags of fertilizer per year. But with hybrid corn, 12 bags of fertilizer per cropping or 24 bags per year are applied for a yield of 10 tons per hectare. With Cavendish and Lakatan banana, 32 to 35 bags per hectare per year are needed for optimum productivity.
Moreover, mature oil palm trees have more extensive canopy than coconuts, and weeds in an oil palm plantation are limited, so herbicide application is less. This is also the reason why a lower plant density is recommended if small ruminant production is incorporated in oil palm farming to promote growth of grasses in the farm for grazing.
Since oil palm farming creates a very healthful environment suitable for vermiculture and production of small livestock, it is also ideal to plant oil palm in parks and resorts. Royal, foxtail or fishtail palms give parks and resorts shade and beauty. In fact in Malaysia, Indonesia and Thailand oil palm trees are used as ornamentals in hotels, resorts and high-ways.
Because oil palm fruits are harvested every 10 days, it gives more income than most crops. With coconuts, rice and corn for instance, farmers only earn every four months. With fruit trees, farmers make money once or twice a year. With sugarcane, income comes once a year and replanting is every two to three years.
But with oil palm, the yearly income of a farmer with a medium sized farm is at least P182,000 per hectare. This means he gets P15,167 per month or P5,505 every 10 days. More so if the farm is in a favorable environment; the annual income reaches P325,: per hectare or P9,042 every 10 days!
Coconut, corn and many fruit trees require intensive and expensive post-harvest practices each harvest. Not with oil palm farming.
All that an oil farmer has to do is to harvest and deliver the fruits to the milling plant within 2-3 days after harvest. The earlier the delivery, the better because the quality of the oil depends on the condition of the fruits.
Harvesting does not also require much labor, as in sugarcane farming. This is the reason why many highly productive sugar-cane fields in Thailand are converted to irrigated oil palm trees to prevent farm labor shortages during harvest.
By the way, irrigated oil palm trees yield 10 tons higher. The added yield amounts to P75,000, much higher than the annual net income from irrigated rice farm.
Harvesting and post-harvest handling of oil palm is cheaper compared to coconut, rubber, and other crops. The cost of harvesting and delivering 1 ton of oil palm fruits to the milling plant is less than P500. This is just 7 percent of the gross sale if the price is P7,500 per ton.
But with rubber and coconut, farmers normally spend one-third of the gross sale for harvesting and processing, and that is P2,500 for every P7,500 of gross sale. In rice and corn farms, about 20 percent of the gross sales goes to harvesting, threshing and drying.
Compared to rice and corn, oil palm is less adversely affected by climate change. Complete crop failure can happen with rice, corn, and other field crops when moderate to extreme drought or flood occurs, but not with oil palm.
Because oil palm trees are heavy consumers of CO2 from the atmosphere, in the process they help reduce the “green-house effect,” which causes climate change.
Also, current techniques in oil palm production ensure zero waste management. For instance, the byproducts of milling are used to produce biofuel, biogas and electricity, which reduce dependence on petroleum oil from the Arab countries. So when the prices of petroleum products increase, oil palm farmers may benefit because chances are, the price of palm oil will also increase as it is used to produce biofuel.
Fruit crops like banana, durian and pummelo are prone to stealing, that many farms in Mindanao spend much for security. The good thing with oil palm fruit is that it is difficult to steal!
Oil palm farming generates and diversifies farmers’ economic activities for higher income particularly among small land-holders with 5 ha of landholding or less. That is why in communities of Southern Thailand where oil palm is a dominant crop, farming become vibrant, dynamic and progressive. This is because in oil palm farming, a farmer spends only one day every ten days for harvesting of ripe fruit bunches.
Another day is need for maintenance like ring weeding, leaf-pruning, and fertilization. Both activities are carried out in a cool and healthful environment under the canopy of the oil palm trees. As noted in Southern Thailand, the eight free days plus part of the high income of the farmer are used to develop other farming enterprises for added income right under his mature oil palm trees. After all, the environment under the oil palm trees is highly suitable for mushroom production, vermiculture for organic fertilizer production, raising of small ruminants like swine, goats, and sheeps, broilers and native chicken for game and food.
In many parts of Malaysia and Southern Thailand, oil palm farmers are raising “Pawakan”, a native chicken also found in Jolo and Basilan, for food and recreation as cock fighting for fun as betting is prohibited in Muslim communities.
Outside his oil palm farm a farmer engages in the production of other crops — rice, corn, fruit trees, fish culture, fishing in the lakes and other bodies of water, carpentry work, retail stores, etc. In communities where oil palm farming is prominent in Indonesia and Thai-land, rural enterprises become progressive, dynamic and vibrant. Farmers have the capacity to construct concrete houses. Cogon and nipa houses are things of the past in these communities. Oil palm farmers have the capacity to buy brand new household appliances, cars and other four-wheeled vehicles, personal goods and a variety of nutritious foods. In fact, in Southern Thailand eating with friends in the restaurant and parks in the evening is a favorite pastime of oil palm farmers.
It’s high time to give our field crop farmers in Southern Philippines the needed break. For years farmers have been engaged in back aching and rigorous farm activities of planting various field crops under the scorching heat of the sun. Not necessarily for food but for cash to support the other needs of the family. These farmers need assistance in utilizing a part or a whole of their farms to plant an easy-to-plant and maintain oil palm trees. Idle and underutilized lands largely infested by cogon should be reforested using oil palm trees both for food and climate change mitigation. Large areas grown to old and senile coconut trees should be replaced with oil palm trees.
A famous Canadian Agricultural Scientist, Dr. T.H. Fairhust was correct in saying that oil palm is “the great-est crop of Southeast Asia”. In Malaysia, Indonesia, and Southern Thailand, the rural populace are enjoying the prosperity brought about by high income in oil palm farming. Although Southern Philippines is a part of the world’s best area for oil palm farming, its populace is not enjoying this prosperity. This is mainly because the Philippine government has not promoted the planting of oil palm at the level similar to those being carried out by the governments of the three other countries mentioned above.
Oil palm farming can help bring prosperity to the impoverished communities of Southern Philippines with rich agricultural resources. The small landholders should be taught and provided with resources to plant oil palm trees similar to what is done in neighboring countries in the South. The prosperity of farmers in oil palm farming will likewise bring prosperity to the country as a whole. Oil palm farming should be nurtured to become a major type of crop farming in Southern Philippines.
Contact:
The Secretariat – Philippine Palmoil Development Council, Inc
2nd Flr., Quality Appliances Bldg.
Alunan Highway, Tacurong City, Sultan Kudarat
Email: ppdci@yahoo.com.ph
Tel No. (064) 200-3881
Web: www.ppdci.org
Source: trc.gov.ph
Recently, many farmers asked me what is the best crop to plant. With my experience as a farmer and agricultural technician and consultant, my first choice is oil palm, and I suggest that small landholders with only 3 to 5 hectares should plant a part of or their Whole farm to this crop. For one, compared to coconut, oil palm is easy to plant and maintain as it does not require much time for maintenance, harvesting and even marketing. For another, oil palm has many comparative advantages over other crops.
Similar to the best hybrid corn, oil palm H hybrid grows fast and is very sturdy once planted in the field. Oil palm trees are greener in weedy fields, where coconut trees may appear chlorotic due to weed competition.
Also, oil palm is not prone to damage by moderate drought or floods once established compared to possible extensive damage on field crops, lansones, duriam and other fruit trees. And compared to coconuts, oil palm trees are more profitable as it has much higher yield and income.
Moreover, one need not cultivate the grass fields or burn the cut second growth forest trees to successfully plant oil palm trees. Just let the forest trees decay as organic fertilizer for oil palm trees. I have tried this, and I successfully planted 5-hectare gmelina-logged-over farm without cultivation
Few maintenance activities are needed in oil palm farming compared to fruit farming, which requires time-demanding activities like pruning, irrigation and pesticide spraying, and to banana production, which needs weekly leaf pruning, monthly fertilization and desuckering.
Oil palm can thrive in flat upland plains and in hilly lands with less than 18° slope. It can also grow in newly drained swampy areas and drained lowland ricefields. It also does not require extensive drainage canals as in Cavendish or Lakatan banana farming.
Most oil palm hybrids are highly productive at lower elevations of not more than 500 meters above sea level (MASL) much similar to the elevation requirements of mango, pummelo, and other tropical tree crops. But there are new oil palm hybrids which are suitable for higher elevations of up to 1,000 MASL, where many tropical crops, including fruit and rubber trees are no longer suitable. This offers the opportunity for oil palm to be used in reforesting the denuded and cogonal high-lands to make these lands productive.
Oil palm trees produce the first commercial quantity of fruit bunches in just two years (or up to 28 months) after planting. So for farmers to cam within a year, they might as well intercrop oil palm with rice, corn, vegetables, peanut, or legumes. It can also be intercropped with lakatan banana and pineapple.
Oil palm farming is also a good investment. Because unlike coconut trees and many fruit trees which come to bearing on the average of Oil palm has fewer pest and disease problems compared to rice, corn, vegetables, and other high-value crops. Likewise, oil palm only requires minimal amount of pesticides.
For instance, mango needs six to seven pesticide sprays during fruiting season, so as with durian and more so with pummel°, which requires 10 to 12 sprayings from flowering to fruit development against rind borer. With Cavendish and Lakatan banana, such requirement is doubled; they need 22 sprayings of fungicides and insecticides per year!
Mature oil palm trees also require lesser amount of fertilizer compared to commercial hybrid corn and banana. They only need 18 bags of fertilizer per year. If supplemented with organic fertilizer, they would only need 10 bags of fertilizer per year. But with hybrid corn, 12 bags of fertilizer per cropping or 24 bags per year are applied for a yield of 10 tons per hectare. With Cavendish and Lakatan banana, 32 to 35 bags per hectare per year are needed for optimum productivity.
Moreover, mature oil palm trees have more extensive canopy than coconuts, and weeds in an oil palm plantation are limited, so herbicide application is less. This is also the reason why a lower plant density is recommended if small ruminant production is incorporated in oil palm farming to promote growth of grasses in the farm for grazing.
Since oil palm farming creates a very healthful environment suitable for vermiculture and production of small livestock, it is also ideal to plant oil palm in parks and resorts. Royal, foxtail or fishtail palms give parks and resorts shade and beauty. In fact in Malaysia, Indonesia and Thailand oil palm trees are used as ornamentals in hotels, resorts and high-ways.
Because oil palm fruits are harvested every 10 days, it gives more income than most crops. With coconuts, rice and corn for instance, farmers only earn every four months. With fruit trees, farmers make money once or twice a year. With sugarcane, income comes once a year and replanting is every two to three years.
But with oil palm, the yearly income of a farmer with a medium sized farm is at least P182,000 per hectare. This means he gets P15,167 per month or P5,505 every 10 days. More so if the farm is in a favorable environment; the annual income reaches P325,: per hectare or P9,042 every 10 days!
Coconut, corn and many fruit trees require intensive and expensive post-harvest practices each harvest. Not with oil palm farming.
All that an oil farmer has to do is to harvest and deliver the fruits to the milling plant within 2-3 days after harvest. The earlier the delivery, the better because the quality of the oil depends on the condition of the fruits.
Harvesting does not also require much labor, as in sugarcane farming. This is the reason why many highly productive sugar-cane fields in Thailand are converted to irrigated oil palm trees to prevent farm labor shortages during harvest.
By the way, irrigated oil palm trees yield 10 tons higher. The added yield amounts to P75,000, much higher than the annual net income from irrigated rice farm.
Harvesting and post-harvest handling of oil palm is cheaper compared to coconut, rubber, and other crops. The cost of harvesting and delivering 1 ton of oil palm fruits to the milling plant is less than P500. This is just 7 percent of the gross sale if the price is P7,500 per ton.
But with rubber and coconut, farmers normally spend one-third of the gross sale for harvesting and processing, and that is P2,500 for every P7,500 of gross sale. In rice and corn farms, about 20 percent of the gross sales goes to harvesting, threshing and drying.
Compared to rice and corn, oil palm is less adversely affected by climate change. Complete crop failure can happen with rice, corn, and other field crops when moderate to extreme drought or flood occurs, but not with oil palm.
Because oil palm trees are heavy consumers of CO2 from the atmosphere, in the process they help reduce the “green-house effect,” which causes climate change.
Also, current techniques in oil palm production ensure zero waste management. For instance, the byproducts of milling are used to produce biofuel, biogas and electricity, which reduce dependence on petroleum oil from the Arab countries. So when the prices of petroleum products increase, oil palm farmers may benefit because chances are, the price of palm oil will also increase as it is used to produce biofuel.
Fruit crops like banana, durian and pummelo are prone to stealing, that many farms in Mindanao spend much for security. The good thing with oil palm fruit is that it is difficult to steal!
Oil palm farming generates and diversifies farmers’ economic activities for higher income particularly among small land-holders with 5 ha of landholding or less. That is why in communities of Southern Thailand where oil palm is a dominant crop, farming become vibrant, dynamic and progressive. This is because in oil palm farming, a farmer spends only one day every ten days for harvesting of ripe fruit bunches.
Another day is need for maintenance like ring weeding, leaf-pruning, and fertilization. Both activities are carried out in a cool and healthful environment under the canopy of the oil palm trees. As noted in Southern Thailand, the eight free days plus part of the high income of the farmer are used to develop other farming enterprises for added income right under his mature oil palm trees. After all, the environment under the oil palm trees is highly suitable for mushroom production, vermiculture for organic fertilizer production, raising of small ruminants like swine, goats, and sheeps, broilers and native chicken for game and food.
In many parts of Malaysia and Southern Thailand, oil palm farmers are raising “Pawakan”, a native chicken also found in Jolo and Basilan, for food and recreation as cock fighting for fun as betting is prohibited in Muslim communities.
Outside his oil palm farm a farmer engages in the production of other crops — rice, corn, fruit trees, fish culture, fishing in the lakes and other bodies of water, carpentry work, retail stores, etc. In communities where oil palm farming is prominent in Indonesia and Thai-land, rural enterprises become progressive, dynamic and vibrant. Farmers have the capacity to construct concrete houses. Cogon and nipa houses are things of the past in these communities. Oil palm farmers have the capacity to buy brand new household appliances, cars and other four-wheeled vehicles, personal goods and a variety of nutritious foods. In fact, in Southern Thailand eating with friends in the restaurant and parks in the evening is a favorite pastime of oil palm farmers.
It’s high time to give our field crop farmers in Southern Philippines the needed break. For years farmers have been engaged in back aching and rigorous farm activities of planting various field crops under the scorching heat of the sun. Not necessarily for food but for cash to support the other needs of the family. These farmers need assistance in utilizing a part or a whole of their farms to plant an easy-to-plant and maintain oil palm trees. Idle and underutilized lands largely infested by cogon should be reforested using oil palm trees both for food and climate change mitigation. Large areas grown to old and senile coconut trees should be replaced with oil palm trees.
A famous Canadian Agricultural Scientist, Dr. T.H. Fairhust was correct in saying that oil palm is “the great-est crop of Southeast Asia”. In Malaysia, Indonesia, and Southern Thailand, the rural populace are enjoying the prosperity brought about by high income in oil palm farming. Although Southern Philippines is a part of the world’s best area for oil palm farming, its populace is not enjoying this prosperity. This is mainly because the Philippine government has not promoted the planting of oil palm at the level similar to those being carried out by the governments of the three other countries mentioned above.
Oil palm farming can help bring prosperity to the impoverished communities of Southern Philippines with rich agricultural resources. The small landholders should be taught and provided with resources to plant oil palm trees similar to what is done in neighboring countries in the South. The prosperity of farmers in oil palm farming will likewise bring prosperity to the country as a whole. Oil palm farming should be nurtured to become a major type of crop farming in Southern Philippines.
Contact:
The Secretariat – Philippine Palmoil Development Council, Inc
2nd Flr., Quality Appliances Bldg.
Alunan Highway, Tacurong City, Sultan Kudarat
Email: ppdci@yahoo.com.ph
Tel No. (064) 200-3881
Web: www.ppdci.org
Source: trc.gov.ph
↧
↧
Cacao genes improvement to speed up development of the country’s chocolate industry

 Photo by leosfarm.com [/caption]
Funded by the Philippine Council for Agriculture, Aquatic, and Natural Resources Research and Development of the Department of Science and Technology (DOST-PCAARRD), the project seeks to address yield loss in cacao, which is estimated at 40% due to pests and diseases.
The project is titled Functional genomics assisted development of gene markers for economically important traits in cacao production and varietal improvement.
In specific terms, the project aims to produce cacao variety with durable and sustainable resistance to pests and diseases and high bean quality for chocolate production.
Doing away with conventional or natural breeding, which takes a long time, scientists will adopt functional genomics equipped with recent advances made in Next Generation Sequencing” (NGS) technologies.
The NGS technologies provide advanced and faster tools that will facilitate systematic comparison of cacao’s gene function. They can test the gene samples with more accuracy and efficiency.
These technologies, combined with the development of bioinformatics approaches, shall greatly reduce traditional way of breeding. Applying the whole sequence analysis using NGS can also help in avoiding researcher’s prejudice.
The genetics-based project on cacao’s genes and physical characteristics is expected to pave the way towards subjecting cacao to the Philippines’ functional genomics protocols. Its output may serve as the blueprint towards better understanding the genes and how they relate to yield, stress, tolerance, and disease resistance.
The project is a joint collaboration of the University of Southern Mindanao, the University of the Philippines Los Baños, Philippine Genome Center, and the Department of Science and Technology.
Commencing in early 2015, the three-year project is expected to produce a map of the genes of the best cacao varieties that can be used to develop a more superior variety best suited to Philippine conditions.
This research initiative on cacao is one of DOST-PCAARRD’s commitment under Outcome One, which is to provide science-based know how and tools that will enable the agricultural sector to raise productivity to world-class standards.
by Ricardo R. Argana, DOST-PCAARRD and John Aries Tabora PhD., University of Southern Mindanao Kabacan, North Cotabato
Photo by leosfarm.com [/caption]
Funded by the Philippine Council for Agriculture, Aquatic, and Natural Resources Research and Development of the Department of Science and Technology (DOST-PCAARRD), the project seeks to address yield loss in cacao, which is estimated at 40% due to pests and diseases.
The project is titled Functional genomics assisted development of gene markers for economically important traits in cacao production and varietal improvement.
In specific terms, the project aims to produce cacao variety with durable and sustainable resistance to pests and diseases and high bean quality for chocolate production.
Doing away with conventional or natural breeding, which takes a long time, scientists will adopt functional genomics equipped with recent advances made in Next Generation Sequencing” (NGS) technologies.
The NGS technologies provide advanced and faster tools that will facilitate systematic comparison of cacao’s gene function. They can test the gene samples with more accuracy and efficiency.
These technologies, combined with the development of bioinformatics approaches, shall greatly reduce traditional way of breeding. Applying the whole sequence analysis using NGS can also help in avoiding researcher’s prejudice.
The genetics-based project on cacao’s genes and physical characteristics is expected to pave the way towards subjecting cacao to the Philippines’ functional genomics protocols. Its output may serve as the blueprint towards better understanding the genes and how they relate to yield, stress, tolerance, and disease resistance.
The project is a joint collaboration of the University of Southern Mindanao, the University of the Philippines Los Baños, Philippine Genome Center, and the Department of Science and Technology.
Commencing in early 2015, the three-year project is expected to produce a map of the genes of the best cacao varieties that can be used to develop a more superior variety best suited to Philippine conditions.
This research initiative on cacao is one of DOST-PCAARRD’s commitment under Outcome One, which is to provide science-based know how and tools that will enable the agricultural sector to raise productivity to world-class standards.
by Ricardo R. Argana, DOST-PCAARRD and John Aries Tabora PhD., University of Southern Mindanao Kabacan, North Cotabato
↧
How to Start a Mongo Production Business

 by dinesh_valke") Photo by dinesh_valke [/caption]
Technical Description
Mungbean (Vigna radiata Wilczek), commonly called mongo, is the cheapest source of vegetable protein with protein content of 20-25 percent. It is rich in vitamins, calcium and sodium, which are usually deficient in most bean diets. It is an excellent crop for green manuring, because it matures early, grows fast and produces abundant vegetative tops.
Utilization
Mungbeans are mainly utilized for human food: infant supplements, snacks, desserts and viands. It is a basic ingredient in popular food items like hopia, butse-butse, sotanghon and halo-halo. It is cooked with meat or shrimps or served as vegetable dish. It is the basic material in the preparation of piyaya, an ilonggo delicacy. Its sprouts in meal dishes are very popular not only in the Philippines but also in Japan, Korea, Taiwan and Thailand. It is also a relovent, carminative and antipoisoning agent.
Farm Practices
Mongo is a Nitrogen-rich crop used in intecropping rotation and relay cropping. Farmers plant mongo during the second cropping season due to its low moisture content. It is fairly drought-tolerant crop with a short maturity period. It is also used as a substitute for soybean meal in poultry feed formulation.
Mongo is planted by row-grill method, or broadcast method. Harvesting starts within 65-72 days after planting when pods turn brown or black and leaves turn yellow. It is done by handpicking the pods which are then sundried, threshed and packed in sacks.
Specifications
Most common varieties are the native and Imelda. The grains of the native/Imelda variety are green and yellow but the grains are in native than that of Imelda variety.
Whole mongo grains are available for wholesale buying and selling in sacks of 25-30kg each. The minimum volume transaction is one-half sack.
Retailers sell both green and yellow using either big nescafe glass weighing 350gms, one liter caltex can weigh 0.5kg or a salmunan weighing 0.25kg.
Seasonality
Mongo is abundant from February to May, coincides with the second and third cropping season. During the lean months of June to January, mongo from manila augment local supply.
Price Formation and Differentiation
Traders based their prices on demand and supply forecasts. During peak supply of mongo, prices dip by P3.00 to P4.00 per kilogram. On the other hand, prices rise by P5.00 to P6.00 per kilogram during lean months. Imelda variety fetches a higher price in the market.
Market Flow
Farmer/Producer -> Wholesaler/Middlemen -> Retailer -> Consumer
Farmer/Producer -> Processor -> Retailer -> Consumer
Farmer/Producer -> Processor -> Consumer
Farmer/Producer -> Consumer
Marketing Practice
Bulk of farmer’s produce is sold to agents, retailers, wholesalers, wholesaler-retailer, assembler-wholesaler, and processor. Only small quantity is left for food and feeds.
Source: Department of Agriculture
Photo by dinesh_valke [/caption]
Technical Description
Mungbean (Vigna radiata Wilczek), commonly called mongo, is the cheapest source of vegetable protein with protein content of 20-25 percent. It is rich in vitamins, calcium and sodium, which are usually deficient in most bean diets. It is an excellent crop for green manuring, because it matures early, grows fast and produces abundant vegetative tops.
Utilization
Mungbeans are mainly utilized for human food: infant supplements, snacks, desserts and viands. It is a basic ingredient in popular food items like hopia, butse-butse, sotanghon and halo-halo. It is cooked with meat or shrimps or served as vegetable dish. It is the basic material in the preparation of piyaya, an ilonggo delicacy. Its sprouts in meal dishes are very popular not only in the Philippines but also in Japan, Korea, Taiwan and Thailand. It is also a relovent, carminative and antipoisoning agent.
Farm Practices
Mongo is a Nitrogen-rich crop used in intecropping rotation and relay cropping. Farmers plant mongo during the second cropping season due to its low moisture content. It is fairly drought-tolerant crop with a short maturity period. It is also used as a substitute for soybean meal in poultry feed formulation.
Mongo is planted by row-grill method, or broadcast method. Harvesting starts within 65-72 days after planting when pods turn brown or black and leaves turn yellow. It is done by handpicking the pods which are then sundried, threshed and packed in sacks.
Specifications
Most common varieties are the native and Imelda. The grains of the native/Imelda variety are green and yellow but the grains are in native than that of Imelda variety.
Whole mongo grains are available for wholesale buying and selling in sacks of 25-30kg each. The minimum volume transaction is one-half sack.
Retailers sell both green and yellow using either big nescafe glass weighing 350gms, one liter caltex can weigh 0.5kg or a salmunan weighing 0.25kg.
Seasonality
Mongo is abundant from February to May, coincides with the second and third cropping season. During the lean months of June to January, mongo from manila augment local supply.
Price Formation and Differentiation
Traders based their prices on demand and supply forecasts. During peak supply of mongo, prices dip by P3.00 to P4.00 per kilogram. On the other hand, prices rise by P5.00 to P6.00 per kilogram during lean months. Imelda variety fetches a higher price in the market.
Market Flow
Farmer/Producer -> Wholesaler/Middlemen -> Retailer -> Consumer
Farmer/Producer -> Processor -> Retailer -> Consumer
Farmer/Producer -> Processor -> Consumer
Farmer/Producer -> Consumer
Marketing Practice
Bulk of farmer’s produce is sold to agents, retailers, wholesalers, wholesaler-retailer, assembler-wholesaler, and processor. Only small quantity is left for food and feeds.
Source: Department of Agriculture
↧
Rice straw maintains soil fertility

 Photo by Phú Th?nh Co [/caption]
It is estimated that five years of adding rice straw to the soil, 25 pounds of nitrogen can be reduced from the rate of nitrogen fertilizer applied per hectare.
Researchers- Gina Pangga from the Soil Resources Institute, University of the Philippines, College, Laguna and Graeme Blair from the University of England used straw of three rice varieties, namely: Soc Nau, IR 67962 and IR 30 and incorporated them in Alfisol sandy loam soil at a rate of five tons per hectare. They examined the nutrients released by these varieties under flooded and non-flooded conditions and noted their effects on the growth of rice.
Rice plants grown under flooded conditions after adding the straw showed higher yields compared to those that were not flooded. This is because water helps the plants make full use of nitrogen. Flooding the soil can also control weeds, rice water weevil and the stem rot disease. Among the three rice varieties, Soc Nau straw had the highest nitrogen, phosphorus and sulfur- nutrients that are needed by the rice plants for growth and development. It had also the highest straw quality index (SQI).
Straw can improve soil texture and tilth, aeration and water-holding capacity, fertility and soil pH. Because rice straw is composted and not burnt, less carbon dioxide is released into the atmosphere. In the long term, adding straw reduces the need for chemical fertilizers that can damage the environment. This technology turns a problem into a solution by using formerly wasted rice straw to benefit the soil. The process fits into farmers' busy planting schedules and can help make them more independent of chemical inputs purchased externally. Instead of being unwanted and difficult to dispose of, rice straw could be recycled on the farm.
-----------------
Source:
Nutrient Release from Straw of Three Rice Varieties and the Impact on the Growth of Rice by Gina Villegas Pangga from the Soil Resources Institute, University of the Philippines, College, Laguna and Graeme Blair of the Division of Agronomy and Soil Science, School of Rural Science, University of New England, Armidale, Australia
by Junelyn S. de la Rosa, BAR Chronicle, August 2002 Issue (Vol. 3 No. 14)
Photo by Phú Th?nh Co [/caption]
It is estimated that five years of adding rice straw to the soil, 25 pounds of nitrogen can be reduced from the rate of nitrogen fertilizer applied per hectare.
Researchers- Gina Pangga from the Soil Resources Institute, University of the Philippines, College, Laguna and Graeme Blair from the University of England used straw of three rice varieties, namely: Soc Nau, IR 67962 and IR 30 and incorporated them in Alfisol sandy loam soil at a rate of five tons per hectare. They examined the nutrients released by these varieties under flooded and non-flooded conditions and noted their effects on the growth of rice.
Rice plants grown under flooded conditions after adding the straw showed higher yields compared to those that were not flooded. This is because water helps the plants make full use of nitrogen. Flooding the soil can also control weeds, rice water weevil and the stem rot disease. Among the three rice varieties, Soc Nau straw had the highest nitrogen, phosphorus and sulfur- nutrients that are needed by the rice plants for growth and development. It had also the highest straw quality index (SQI).
Straw can improve soil texture and tilth, aeration and water-holding capacity, fertility and soil pH. Because rice straw is composted and not burnt, less carbon dioxide is released into the atmosphere. In the long term, adding straw reduces the need for chemical fertilizers that can damage the environment. This technology turns a problem into a solution by using formerly wasted rice straw to benefit the soil. The process fits into farmers' busy planting schedules and can help make them more independent of chemical inputs purchased externally. Instead of being unwanted and difficult to dispose of, rice straw could be recycled on the farm.
-----------------
Source:
Nutrient Release from Straw of Three Rice Varieties and the Impact on the Growth of Rice by Gina Villegas Pangga from the Soil Resources Institute, University of the Philippines, College, Laguna and Graeme Blair of the Division of Agronomy and Soil Science, School of Rural Science, University of New England, Armidale, Australia
by Junelyn S. de la Rosa, BAR Chronicle, August 2002 Issue (Vol. 3 No. 14)
↧
WHO affirms GM foods passed Codex food safety tests; breeders urged CA to review decision stopping Bt eggplant trial

 Plant breeding experts at the Philippines’ premiere plant breeding agency, Institute of Plant Breeding (IPB), have asserted the global position of highly-respected institutions like WHO on the safety of GM foods.
“Several esteemed international organizations such as WHO concluded that consuming foods with ingredients derived from GM crops is ‘no riskier’ than consuming the same foods with ingredients from crops modified conventionally,” according to Dr. Ruben L. Villareal, National Academy of Science and Technology (NAST) agricultural sciences chairman.
The GM technology, considered to be under biotechnology, is in fact a major tool that can make Philippine agriculture competitive, he said. Villareal was one of the founders of IPB, University of the Philippines-Los Banos’s (UPLB) plant breeding arm.
“Through biotechnology, new varieties that would be advantageous to farmers, consumers, and the environment could be developed,” said Villareal.
Review of CA decision urged
The Court of Appeals (CA) just issued a decision last month stopping field trials of the GM Bacillus thuringiensis (Bt) eggplant.
But Villareal urged the CA to review its decision stopping the Bt eggplant trial.
“With the numerous global evidences already known, I cannot understand the basis of the decision. I hope that our legal experts and the court could revisit and look deeply at the scientific evidences and the long experience of around 30 countries planting 170.3 million hectares of biotech crops including the Philippines,” he said.
Bt eggplant benefits
Bt eggplant (talong in Filipino) will significantly benefit farmers through less exposure to chemical pesticides. That has been proven scientifically contrary to accusations raised by anti-GM advocates.
Studies have shown numerous potential benefits of Bt talong to Filipino farmers and consumers. This includes reduction in farm labor costs by 10 to 25 percent and reducing pesticide applications by 60 percent, according to IPB. With less pesticide spray, consumers will also benefit from eggplant that has not been excessively sprayed with pesticide.
Bt eggplant enables up to 64 percent increase in yield and income for farmers.
Compared to conventional varieties, they can enjoy up to an additional income of P50,000 per hectare.
Bt eggplant will alter the practice, and its harmful health effects, of farmers in Pangasinan who extensively use insecticide on their eggplant. Some farmers are found to even dip eggplants on a bucketful of insecticide just to ensure the eggplants are not destroyed by the pest fruit and shoot borer.
“Bt eggplant aims to provide an effective alternative to eggplant farmers who are plagued by needing incessant pesticide spraying that directly cause environmental and health hazards,” said Villareal.
WHO position
WHO declared that different GM foods go through the global food safety process called Codex Alimentarius Risk Analysis of Foods Derived from Modern Biotechnology under which these foods are not found to be risky to human health.
“GM foods currently available on the international market have passed risk assessments and are not likely to present risks for human health, “ according to a WHO statement.
“No effects on human health have been shown as a result of the consumption of such foods by the general population in the countries where they have been approved. Continuous use of risk assessments based on the Codex principles and, where appropriate, including post market monitoring, should form the basis for evaluating the safety of GM foods.”
Legal sanction
Villareal asserted consumers should support IPB in the development of crops that raise farmers’ yield and income and reduce the exposure to pesticide of farmers, consumers, and the environment.
IPB was specifically created to develop crops beneficial for Filipino consumers and farmers. Its creation is sanctioned by the Seed Industry Development Act of 1992.
“UPLB is mandated by law to use biotechnology in (crops’) variety improvement. It is thus UPLB’s duty to develop these new helpful varieties,” said Villareal. “IPB’s existence will be rendered irrelevant if it cannot pursue its legal mandate which is academic research within the bounds of sound and science-based regulatory system.”
UN FAO
Dr. Ernelea Cao, a UP Diliman (UPD) Professor of the Institute of Biology and former Director of the Natural Sciences Research Institute (NSRI) of UPD, also stated that biotech crops and its food products are safe.
GM crops undergo assessments that abide by internationally accepted scientific standards of the United Nations-Food and Agriculture Organization and WHO CODEX Alimentarius, said CAO.
The Food and Drug Administration of the Philippines also recently released Advisory No. 2013-014 reiterating the safety of GM foods because these have passed the international standards for food safety assessment.
According to Dr. Cao, the accumulated body of knowledge and experimental data and the experience on scientific monitoring on the use of biotech crops and products worldwide in more than one billion hectares over the past 17 years are the most compelling evidences of the safety of this kind of technology.
Villareal also cited the statements of the American Association for the Advancement of Science, the US National Academy of Sciences, and the British Royal Society that consuming foods with ingredients derived from GM crops is as safe as those of other plants developed through conventional means.
A decade of biotechnology use
Biotechnology is identified by NAST as a tool to boost agricultural productivity; to be used as feed and to improve the lives of the increasing population; and address environmental degradation, hunger and poverty.
The Philippines actually pioneered the establishment of biosafety regulations in Asia when then President Corazon C. Aquino created the National Committee on Biosafety of the Philippines in 1990 to ensure the responsible use of modern biotechnology for national development.
It continues to be the leading country in Asia in biosafety regulation and commercial use of GM crops. The adoption of GM corn for the past 10 years had been primarily responsible for the country finally attaining the goal of self-sufficiency in feed supply for the first time in 2012. According to ISAAA, the area of biotech corn production in the Philippines reached around 750,000 hectares in 2012.
Field trials
The UPLB-IPB had been conducting field trials of Bt talong from 2010 to 2012 in compliance with the biosafety requirements and guidelines approved by national regulatory bodies, specifically the Bureau of Plant Industry of the agriculture/" title="View all articles about Department of Agriculture here">Department of Agriculture. All trials have been completed as of August 2012.
The Bt technology have been used widely, successfully and safely worldwide in other crops such as Bt corn and Bt cotton. The Organization for Economic Cooperation and Development (OECD) already affirmed the scientific consensus and declared the safety of Bt technology and the transgenic/GM crops derived using Bt insecticidal proteins.
###
For interview requests, please call Ms. Analiza C. Mendoza, 0906-239-2362. For updates on biotechnology, visit SEARCA BIC’s website: www.bic.searca.org
Plant breeding experts at the Philippines’ premiere plant breeding agency, Institute of Plant Breeding (IPB), have asserted the global position of highly-respected institutions like WHO on the safety of GM foods.
“Several esteemed international organizations such as WHO concluded that consuming foods with ingredients derived from GM crops is ‘no riskier’ than consuming the same foods with ingredients from crops modified conventionally,” according to Dr. Ruben L. Villareal, National Academy of Science and Technology (NAST) agricultural sciences chairman.
The GM technology, considered to be under biotechnology, is in fact a major tool that can make Philippine agriculture competitive, he said. Villareal was one of the founders of IPB, University of the Philippines-Los Banos’s (UPLB) plant breeding arm.
“Through biotechnology, new varieties that would be advantageous to farmers, consumers, and the environment could be developed,” said Villareal.
Review of CA decision urged
The Court of Appeals (CA) just issued a decision last month stopping field trials of the GM Bacillus thuringiensis (Bt) eggplant.
But Villareal urged the CA to review its decision stopping the Bt eggplant trial.
“With the numerous global evidences already known, I cannot understand the basis of the decision. I hope that our legal experts and the court could revisit and look deeply at the scientific evidences and the long experience of around 30 countries planting 170.3 million hectares of biotech crops including the Philippines,” he said.
Bt eggplant benefits
Bt eggplant (talong in Filipino) will significantly benefit farmers through less exposure to chemical pesticides. That has been proven scientifically contrary to accusations raised by anti-GM advocates.
Studies have shown numerous potential benefits of Bt talong to Filipino farmers and consumers. This includes reduction in farm labor costs by 10 to 25 percent and reducing pesticide applications by 60 percent, according to IPB. With less pesticide spray, consumers will also benefit from eggplant that has not been excessively sprayed with pesticide.
Bt eggplant enables up to 64 percent increase in yield and income for farmers.
Compared to conventional varieties, they can enjoy up to an additional income of P50,000 per hectare.
Bt eggplant will alter the practice, and its harmful health effects, of farmers in Pangasinan who extensively use insecticide on their eggplant. Some farmers are found to even dip eggplants on a bucketful of insecticide just to ensure the eggplants are not destroyed by the pest fruit and shoot borer.
“Bt eggplant aims to provide an effective alternative to eggplant farmers who are plagued by needing incessant pesticide spraying that directly cause environmental and health hazards,” said Villareal.
WHO position
WHO declared that different GM foods go through the global food safety process called Codex Alimentarius Risk Analysis of Foods Derived from Modern Biotechnology under which these foods are not found to be risky to human health.
“GM foods currently available on the international market have passed risk assessments and are not likely to present risks for human health, “ according to a WHO statement.
“No effects on human health have been shown as a result of the consumption of such foods by the general population in the countries where they have been approved. Continuous use of risk assessments based on the Codex principles and, where appropriate, including post market monitoring, should form the basis for evaluating the safety of GM foods.”
Legal sanction
Villareal asserted consumers should support IPB in the development of crops that raise farmers’ yield and income and reduce the exposure to pesticide of farmers, consumers, and the environment.
IPB was specifically created to develop crops beneficial for Filipino consumers and farmers. Its creation is sanctioned by the Seed Industry Development Act of 1992.
“UPLB is mandated by law to use biotechnology in (crops’) variety improvement. It is thus UPLB’s duty to develop these new helpful varieties,” said Villareal. “IPB’s existence will be rendered irrelevant if it cannot pursue its legal mandate which is academic research within the bounds of sound and science-based regulatory system.”
UN FAO
Dr. Ernelea Cao, a UP Diliman (UPD) Professor of the Institute of Biology and former Director of the Natural Sciences Research Institute (NSRI) of UPD, also stated that biotech crops and its food products are safe.
GM crops undergo assessments that abide by internationally accepted scientific standards of the United Nations-Food and Agriculture Organization and WHO CODEX Alimentarius, said CAO.
The Food and Drug Administration of the Philippines also recently released Advisory No. 2013-014 reiterating the safety of GM foods because these have passed the international standards for food safety assessment.
According to Dr. Cao, the accumulated body of knowledge and experimental data and the experience on scientific monitoring on the use of biotech crops and products worldwide in more than one billion hectares over the past 17 years are the most compelling evidences of the safety of this kind of technology.
Villareal also cited the statements of the American Association for the Advancement of Science, the US National Academy of Sciences, and the British Royal Society that consuming foods with ingredients derived from GM crops is as safe as those of other plants developed through conventional means.
A decade of biotechnology use
Biotechnology is identified by NAST as a tool to boost agricultural productivity; to be used as feed and to improve the lives of the increasing population; and address environmental degradation, hunger and poverty.
The Philippines actually pioneered the establishment of biosafety regulations in Asia when then President Corazon C. Aquino created the National Committee on Biosafety of the Philippines in 1990 to ensure the responsible use of modern biotechnology for national development.
It continues to be the leading country in Asia in biosafety regulation and commercial use of GM crops. The adoption of GM corn for the past 10 years had been primarily responsible for the country finally attaining the goal of self-sufficiency in feed supply for the first time in 2012. According to ISAAA, the area of biotech corn production in the Philippines reached around 750,000 hectares in 2012.
Field trials
The UPLB-IPB had been conducting field trials of Bt talong from 2010 to 2012 in compliance with the biosafety requirements and guidelines approved by national regulatory bodies, specifically the Bureau of Plant Industry of the agriculture/" title="View all articles about Department of Agriculture here">Department of Agriculture. All trials have been completed as of August 2012.
The Bt technology have been used widely, successfully and safely worldwide in other crops such as Bt corn and Bt cotton. The Organization for Economic Cooperation and Development (OECD) already affirmed the scientific consensus and declared the safety of Bt technology and the transgenic/GM crops derived using Bt insecticidal proteins.
###
For interview requests, please call Ms. Analiza C. Mendoza, 0906-239-2362. For updates on biotechnology, visit SEARCA BIC’s website: www.bic.searca.org
↧
↧
Genetically modified foods: how safe are they?

 It was the same issue that public and various sectors raised when the first genetically modified plant (a tomato with a delayed ripening trait) made its appearance in 1994.
Since then a growing number of biotech crops has been introduced in developed countries and consumed by millions of people all over the world. Reports say that more than 40 varieties of GM crops have been approved for use in the US in the past years.
Why are there questions now on the safety of GM products?
It was the same issue that public and various sectors raised when the first genetically modified plant (a tomato with a delayed ripening trait) made its appearance in 1994.
Since then a growing number of biotech crops has been introduced in developed countries and consumed by millions of people all over the world. Reports say that more than 40 varieties of GM crops have been approved for use in the US in the past years.
Why are there questions now on the safety of GM products?
How are GM crops developed?
Genetically modified crops are developed using the tools of modern biotechnology through a process known as genetic engineering. Just like conventional plant breeding, modern biotechnology works on a common goal of producing superior plant varieties with improved characteristics that make them better and more accessible to people. The difference lies in how this is achieved. In traditional plant breeding, thousands of genes are mixed between two plants. With modern biotechnology, a specific feature or characteristic of the plant is chosen and added to a certain plant. That is why there is Vitamin A enriched rice, a potato with higher starch content, and soybean varieties resistant to chemical herbicides. There are two primary methods used for transferring genes into another plant genome or genetic make-up. The DNA to be introduced into the recipient plant is coated with tiny particles. Once coated, the particles are physically shot on to plant cells using a "gene gun". The second method is the transfer of gene from a beneficial bacterium into the DNA of the recipient plant. Since transferring of genes is involved at all times, some potential risks may also cross the GM foods product line.Allergens
The issues of allergenicity and toxicity seem to be the public's biggest concern whenever there is a new biotech crop. People fear the possibility that GM crops could contain an allergen that could be accidentally introduced into a food product. Food allergies are adverse reactions to a certain food component that results to an abnormal response of the body's immune system to a specific protein or allergen in foods. Food experts and scientists deal with this issue by determining which foods and food components could trigger allergic reactions in both children and adults. In a joint consultation of the Food and Agriculture Organization (FAO) of the United Nations and World Health Organization (WHO) conducted last year in Rome, the safety and nutritional aspects of GM foods were evaluated based on allergenicity. The experts used an approach called "decision-tree" formulated by the International Food Biotechnology Council and the Allergy and Immunology Institute of the International Life Sciences Institute (IFBC/ILSI) in 1996 when the issue of allergenicity of GM foods was specifically addressed for the first time. Using the "decision-tree" approach and some newly-formulated strategies, they carefully assessed the GM foods based on the following criteria: source of the transferred genetic material, molecular weight, products' stability when heated or processed, sequence homology (the similar characteristics in two animals or plants), effect of pH and/or digestive juices, and prevalence in foods. After a series of rigorous evaluation and testing, they concluded that foods derived from GM crops are considered safe if the source of the transferred genes has passed the evaluation criteria stated above. They also stressed that GM foods must undergo a pre-market allergenicity assessment. This, according to them, gives consumers an acceptable safety assurance. The International Service for the Acquisition of Agri-biotech Applications (ISAAA) further supported these results by stating that foods and food components known to have allergens are well characterized and documented, so it is unlikely that they would ever be introduced into a GM food. Also, if there are allergenic properties present in GM foods, it is maintained at a very low level and they are rapidly degraded during the digestion process.Who assures their safety?
GM foods, amidst the heated debates and controversies, are just too valuable to ignore and thus, strictly monitored and regulated at every stage in their development. In the US, the Food and Drug Administration (FDA) is the primary federal agency responsible for determining the safety of foods and food ingredients derived from GM crops. FDA regulates GM foods under the authority of the Federal Food, Drug, and Cosmetic Act, which requires that the GM foods meet the same rigorous safety standards as required for other foods. The role of FDA is said to be more direct and extensive since it consults with the plant developer and reviews the crop's safety and nutritional components. Likewise, the producer of biotech products should ensure that the foods they offer to the public are safe and have complied with legal requirements. At the end of the consultation and review process, the FDA sends a letter of approval to the developer stating that the FDA is satisfied with the data regarding the safeness of the product. The role of FDA also courses across marketing the GM products, particularly in the area of food labelling. According to the FDA, GM products are different, thus, they need to be properly labelled. Here in the Philippines, the "big body" that oversees and monitors the biosafety aspects of GM products is the National Committee on Biosafety, which was created in 1990 by Executive Order 430. It is a multi-sectoral body composed of scientists and representatives of the community responsible for formulating policies and guidelines on various activities related to genetic engineering including research, importation, production, and distribution of GM products. Truly, the number of new foods derived from biotechnology is growing, so is their requirements for investments for assessing their safety. But more importantly, formulating policies on GM crops safety must be based on an open and honest debate involving a wide cross-section of society according to International Service for the Acquisition of Agri-biotech Application.---------------------------------- Sources: International Service for the Acquisition of Agri-biotech Application's fact sheet (Are foods derived from GM crops safe?); Evaluation of Allergenicity of Genetically Modified Foods, a report paper of a Joint FAO/WHO Expert Consultation
By: Mary Charlotte O. Fresco, BAR Digest, April-June 2002 Issue (Vol. 4 No.2)
↧
Cabiao marsh land farmers fast expanding hybrid rice area to 100 hectares from only 30 hectares

 Photo by SciDev.Net [/caption]
However, in the current dry season harvest, they are harvesting more than 200 cavans per hectare. That is equivalent to two or even three times of harvest from ordinary seeds-- even if it is only from one season of planting.
“Our target in our area is immediately to expand hybrid rice to 100 hectares next season,” according to farmer-leader Luisito delos Santos.
He planted the hybrid rice variety SL-18H of SL Agritech Corp. (SLAC) on his 28-hectare rice land this season. Average yield is more than 200 cavans per hectare.
With a high yield, more Filipino farmers earn a net income of P100,000 to P200,000 per hectare.
Most farmers just reap 50 to 80 cavans per hectare using inbred seeds. Harvesting 100 to 120 cavans per hectare from inbreds is already exceptionally good.
Delos Santos’s attractive profit from hybrid seeds since he tried it in year 2000 enabled him to accumulate land for more rice planting. He started with only four hectares then.
By committing to be a hybrid rice winner, he acquired more lands so his area increased to 12 hectares in 2005. By 2010, he had more than 20 hectares.
With his high income now, he just acquired new rice lands so that by himself he will plant SL-
18H on 40 hectares by next cropping.
His brother, Florencio delos Santos and a medical doctor-farmer, Dr. Hubert Lapus, will form part of the group to plant 100 hectares next season. Florencio had a harvest of 280 cavans at 70 kilos per cavan from his planting of SL-18H on 1.8 hectares. Lapus is also medical director of the Paulino J. Garcia Memorial Research and Medical Center.
SL-18H has multiple benefits for farmers planting in a swamp area which is a kind of land found in many places in the Philippines.
There are 34 inland wetlands in the country according to the Society for the Conservation of Inland Wetlands, although not all may be appropriate for rice planting at any given time.
In Cabiao where there is an opportunity to plant rice, using hybrid rice maximizes wealth-creation opportunities.
IN another Nueva Ecija town, in Talavera, Nueva Ecija, farmers belonging to the Nagkakaisang Magsasaka Agricultural Primary MPC (NMAP-MPC) said SL-18H is yielding between 250 to 300 cavans per hectare at 50 kilos per cavan.
“It’s my first time to plant SL-18, and we’re confident of the yield. It gives many stems that are long. The ears of the grain are long. The grains are filled to the tip. If I don’t get at least 250 cavans here, I don’t like to farm anymore (joking),” said Ricardo Buenaventura, NMAP-MPC president.
He planted the hybrid rice on 10 hectares out of his 23 hectares.
Buenaventura is specifically expecting a net income of at least P155,000 even if he just gets 200 cavans.
“At P1,000 per bag (at P20 per kilo) from 200 bags, you get a net of P155,000 since cost is P45,000 to P50,000 per hectare,” he said.
But with 250 cavans, that is an additional P50,000 or a total net earning of P205,000 per hectare which has never been experienced by average Filipino farmers at all. His 10 hectares will give for him P2.050 million!
The high yield from this variety, launched for just one year, is further supplemented by the high price of rice brought about by the Department of Agriculture’s (DA) 2012-2013 rice sufficiency program.
The benefit comes from the Aquino Administration’s position to protect rice farmers from imports.
This time in so many years, many farmers are experiencing improved livelihood due to the high yield along with the high price of paddy rice that currently ranges at P20 to P24 per kilo.
“We’re taking advantage of it since it’s only now that we’re experiencing a good price,” said Buenaventura.
One buyer from Bohol is offering to buy Delos Santos’s palay at a high of P24.50 per kilo.
“They like SL-18 because of good milling quality, good milling recovery,” he said.
Milling recovery for the ordinary rice may reach just 60 to 65 percent.
DA Consultant Santiago R. Obien said SL-18H may have as much milling recovery rate of 67 percent.
Delos Santos has been planting hybrid rice since year 2000 using SL-8H, SLAC’s first hybrid rice variety, or other brands.
“But SL-18 may not be matched by other varieties,” he said. “They do not easily shrivel,” he said.
Santiago dela Cruz, former NMAP-MPC vice chairman, said he expects to harvest more than 200 cavans from SL-18H over the one-hectare land he tills.
“We counted the grains of SL-18, and it’s more than 300 grains per panicle,” said dela Cruz. Other seeds may just give around 200 grains per panicle.
NMAP-MPC itself has grown over the years owing to SLAC’s first hybrid rice variety, SL-8H.
“Before nobody wanted to buy SL-8 even if we’re already assuring farmers we would buy their produce. Now our target is 200,000 bags (of seeds) sold every cropping,” said Buenaventura.
NMAP-MPC is one of the most successful farmers’ group that came about as a result of aggressive hybrid rice program introduced early on during the Arroyo Administration.
It now supplies University of Sto Tomas and its hospital at 2,000 cavans every 15 days.
In order to sustain gains in the hybrid rice sector, farmers are seeking government’s support on a financing or grant program for combine harvester.
A combine harvester boosts farmers’ efficiency. It costs around P1.6 million, and for one that has a flatbed tractor (for transportation), P1.7 million.
With the combine, wastage can only be three percent compared to about 10 percent wastage by combining three processes harvesting, threshing, and winnowing of rice.
Its capacity is to reap rice on one hectare every two hours. With the primitive human labor, harvesting of one hectare may last for a day or two.
“The kabiser (a community leader like a baranggay captain) should have a combine that can be commonly used by farmers. That will help raise our rice production,” said Racquel “Keng” Diamante, SLAC marketing specialist.
When rented, combine fee is 13 cavans per 100 cavans of rice.
Another concern is the high cost of diesel. Delos Santos said he spends a lot for diesel used in pumping water since there is no working national irrigation system.
###
For any questions kindly contact Mr. Luisito delos Santos, 0927-521-8670, Mr. Ricardo Buenaventura, 0918-686-2687; for interview requests, Ms. Analiza C. Mendoza, 0921-338-3816.
Photo by SciDev.Net [/caption]
However, in the current dry season harvest, they are harvesting more than 200 cavans per hectare. That is equivalent to two or even three times of harvest from ordinary seeds-- even if it is only from one season of planting.
“Our target in our area is immediately to expand hybrid rice to 100 hectares next season,” according to farmer-leader Luisito delos Santos.
He planted the hybrid rice variety SL-18H of SL Agritech Corp. (SLAC) on his 28-hectare rice land this season. Average yield is more than 200 cavans per hectare.
With a high yield, more Filipino farmers earn a net income of P100,000 to P200,000 per hectare.
Most farmers just reap 50 to 80 cavans per hectare using inbred seeds. Harvesting 100 to 120 cavans per hectare from inbreds is already exceptionally good.
Delos Santos’s attractive profit from hybrid seeds since he tried it in year 2000 enabled him to accumulate land for more rice planting. He started with only four hectares then.
By committing to be a hybrid rice winner, he acquired more lands so his area increased to 12 hectares in 2005. By 2010, he had more than 20 hectares.
With his high income now, he just acquired new rice lands so that by himself he will plant SL-
18H on 40 hectares by next cropping.
His brother, Florencio delos Santos and a medical doctor-farmer, Dr. Hubert Lapus, will form part of the group to plant 100 hectares next season. Florencio had a harvest of 280 cavans at 70 kilos per cavan from his planting of SL-18H on 1.8 hectares. Lapus is also medical director of the Paulino J. Garcia Memorial Research and Medical Center.
SL-18H has multiple benefits for farmers planting in a swamp area which is a kind of land found in many places in the Philippines.
There are 34 inland wetlands in the country according to the Society for the Conservation of Inland Wetlands, although not all may be appropriate for rice planting at any given time.
In Cabiao where there is an opportunity to plant rice, using hybrid rice maximizes wealth-creation opportunities.
IN another Nueva Ecija town, in Talavera, Nueva Ecija, farmers belonging to the Nagkakaisang Magsasaka Agricultural Primary MPC (NMAP-MPC) said SL-18H is yielding between 250 to 300 cavans per hectare at 50 kilos per cavan.
“It’s my first time to plant SL-18, and we’re confident of the yield. It gives many stems that are long. The ears of the grain are long. The grains are filled to the tip. If I don’t get at least 250 cavans here, I don’t like to farm anymore (joking),” said Ricardo Buenaventura, NMAP-MPC president.
He planted the hybrid rice on 10 hectares out of his 23 hectares.
Buenaventura is specifically expecting a net income of at least P155,000 even if he just gets 200 cavans.
“At P1,000 per bag (at P20 per kilo) from 200 bags, you get a net of P155,000 since cost is P45,000 to P50,000 per hectare,” he said.
But with 250 cavans, that is an additional P50,000 or a total net earning of P205,000 per hectare which has never been experienced by average Filipino farmers at all. His 10 hectares will give for him P2.050 million!
The high yield from this variety, launched for just one year, is further supplemented by the high price of rice brought about by the Department of Agriculture’s (DA) 2012-2013 rice sufficiency program.
The benefit comes from the Aquino Administration’s position to protect rice farmers from imports.
This time in so many years, many farmers are experiencing improved livelihood due to the high yield along with the high price of paddy rice that currently ranges at P20 to P24 per kilo.
“We’re taking advantage of it since it’s only now that we’re experiencing a good price,” said Buenaventura.
One buyer from Bohol is offering to buy Delos Santos’s palay at a high of P24.50 per kilo.
“They like SL-18 because of good milling quality, good milling recovery,” he said.
Milling recovery for the ordinary rice may reach just 60 to 65 percent.
DA Consultant Santiago R. Obien said SL-18H may have as much milling recovery rate of 67 percent.
Delos Santos has been planting hybrid rice since year 2000 using SL-8H, SLAC’s first hybrid rice variety, or other brands.
“But SL-18 may not be matched by other varieties,” he said. “They do not easily shrivel,” he said.
Santiago dela Cruz, former NMAP-MPC vice chairman, said he expects to harvest more than 200 cavans from SL-18H over the one-hectare land he tills.
“We counted the grains of SL-18, and it’s more than 300 grains per panicle,” said dela Cruz. Other seeds may just give around 200 grains per panicle.
NMAP-MPC itself has grown over the years owing to SLAC’s first hybrid rice variety, SL-8H.
“Before nobody wanted to buy SL-8 even if we’re already assuring farmers we would buy their produce. Now our target is 200,000 bags (of seeds) sold every cropping,” said Buenaventura.
NMAP-MPC is one of the most successful farmers’ group that came about as a result of aggressive hybrid rice program introduced early on during the Arroyo Administration.
It now supplies University of Sto Tomas and its hospital at 2,000 cavans every 15 days.
In order to sustain gains in the hybrid rice sector, farmers are seeking government’s support on a financing or grant program for combine harvester.
A combine harvester boosts farmers’ efficiency. It costs around P1.6 million, and for one that has a flatbed tractor (for transportation), P1.7 million.
With the combine, wastage can only be three percent compared to about 10 percent wastage by combining three processes harvesting, threshing, and winnowing of rice.
Its capacity is to reap rice on one hectare every two hours. With the primitive human labor, harvesting of one hectare may last for a day or two.
“The kabiser (a community leader like a baranggay captain) should have a combine that can be commonly used by farmers. That will help raise our rice production,” said Racquel “Keng” Diamante, SLAC marketing specialist.
When rented, combine fee is 13 cavans per 100 cavans of rice.
Another concern is the high cost of diesel. Delos Santos said he spends a lot for diesel used in pumping water since there is no working national irrigation system.
###
For any questions kindly contact Mr. Luisito delos Santos, 0927-521-8670, Mr. Ricardo Buenaventura, 0918-686-2687; for interview requests, Ms. Analiza C. Mendoza, 0921-338-3816.
↧
The exotic dragonfruit: A hot new fruit

 Photo by angela n. [/caption]
Priced at P120-150 a kilo, this fruit is fast becoming a hot new item in the market. A sure profit giver, scientists from the Institute of Plant Breeding (IPB) are encouraging farmers to plant dragonfruit in their backyards.
I learned that the dragonfruit is a climbing cactus whose fragrant white flowers bloom at night. In fact, it is popular as an ornamental in Hawaii and is called Queen of the Night, Moonflower or Lady of the Night because of its magnificent bell-shaped flowers.
Like other fruits, the dragonfruit or strawberry pear is very nutritious. It contains minerals, vitamins, and dietary fiber. It lessens cholesterol and is good for people with diabetes.
The ripe strawberry pear is found delicious, especially if chilled and cut in half so that the flesh can be eaten with a spoon. The juice is enjoyed as a cool drink. A syrup made from the whole fruit is used to color pastries and candy. The unopened flowerbud can be cooked and eaten as a vegetable.
Dragonfruit is also medicinal- the sap of its stems can be used as a vermifuge or dewormer but it is said to be caustic and hazardous. The air-dried, powdered stems contain B-sitosterol which is 30 times more effective than choline in breaking down cholesterol.
The dragonfruit plants can be cultivated using seeds, cuttings and pieces. They are easy to grow and maintain provided they are not overwatered. Like other cacti, they thrive best in well-drained soils such as sand and perlite and bloom best under full sunshine.
To cultivate the plant, stem cuttings can be prepared from plants that are 1/2 to 1 1/2 meter long. Then, these cuttings are stored in a dark area for a week before they are planted in plastic bags filled with a mixture of soil, manure and burnt rice hulls.
When the seedlings are big enough, they can be transplanted to a 30-cm thick plot with a wooden trellis for the them to climb on. They can also be allowed to climb a tree or a wall like other vines or scrambling plants.
Other pointers that are useful are:
1. Plant them in areas that are not infested with ants,
2. Make sure that the plants get enough sunlight
3. Let the branches hang to enhance flowering and
4. Avoid overwatering and letting the soil dry in between waterings, and,
5. Indoors-place them in full sunshine, outdoors- place them in a partially shaded area. And if the leaves develop "burned" spots, give them more shade.
Recently, the dragonfruit has already made its way into the European market and latest figures show cacti fruit sales are soaring across the world. Although consumers are sometimes skeptical, there is a market for new exotic fruits. Farmers can augment their income by planting special crops like these in their backyard or in their farms.
--------------------
Source:
Pagtatanim ng Dragon Fruit by Drs. Rodel Maghirang, Gloria Rodulfo and Eufemio Rasco Jr., Special Crops Project-Vegetable Division, Institute of Plant Breeding, College of Agriculture, UP Los Baños at Telephone No. 049-536-3304 loc 217 and E-mail: rgm2000@yahoo.com
by Junelyn S. de la Rosa, BAR Chronicle, July 2002 Issue (Vol. 3 No. 13)
Photo by angela n. [/caption]
Priced at P120-150 a kilo, this fruit is fast becoming a hot new item in the market. A sure profit giver, scientists from the Institute of Plant Breeding (IPB) are encouraging farmers to plant dragonfruit in their backyards.
I learned that the dragonfruit is a climbing cactus whose fragrant white flowers bloom at night. In fact, it is popular as an ornamental in Hawaii and is called Queen of the Night, Moonflower or Lady of the Night because of its magnificent bell-shaped flowers.
Like other fruits, the dragonfruit or strawberry pear is very nutritious. It contains minerals, vitamins, and dietary fiber. It lessens cholesterol and is good for people with diabetes.
The ripe strawberry pear is found delicious, especially if chilled and cut in half so that the flesh can be eaten with a spoon. The juice is enjoyed as a cool drink. A syrup made from the whole fruit is used to color pastries and candy. The unopened flowerbud can be cooked and eaten as a vegetable.
Dragonfruit is also medicinal- the sap of its stems can be used as a vermifuge or dewormer but it is said to be caustic and hazardous. The air-dried, powdered stems contain B-sitosterol which is 30 times more effective than choline in breaking down cholesterol.
The dragonfruit plants can be cultivated using seeds, cuttings and pieces. They are easy to grow and maintain provided they are not overwatered. Like other cacti, they thrive best in well-drained soils such as sand and perlite and bloom best under full sunshine.
To cultivate the plant, stem cuttings can be prepared from plants that are 1/2 to 1 1/2 meter long. Then, these cuttings are stored in a dark area for a week before they are planted in plastic bags filled with a mixture of soil, manure and burnt rice hulls.
When the seedlings are big enough, they can be transplanted to a 30-cm thick plot with a wooden trellis for the them to climb on. They can also be allowed to climb a tree or a wall like other vines or scrambling plants.
Other pointers that are useful are:
1. Plant them in areas that are not infested with ants,
2. Make sure that the plants get enough sunlight
3. Let the branches hang to enhance flowering and
4. Avoid overwatering and letting the soil dry in between waterings, and,
5. Indoors-place them in full sunshine, outdoors- place them in a partially shaded area. And if the leaves develop "burned" spots, give them more shade.
Recently, the dragonfruit has already made its way into the European market and latest figures show cacti fruit sales are soaring across the world. Although consumers are sometimes skeptical, there is a market for new exotic fruits. Farmers can augment their income by planting special crops like these in their backyard or in their farms.
--------------------
Source:
Pagtatanim ng Dragon Fruit by Drs. Rodel Maghirang, Gloria Rodulfo and Eufemio Rasco Jr., Special Crops Project-Vegetable Division, Institute of Plant Breeding, College of Agriculture, UP Los Baños at Telephone No. 049-536-3304 loc 217 and E-mail: rgm2000@yahoo.com
by Junelyn S. de la Rosa, BAR Chronicle, July 2002 Issue (Vol. 3 No. 13)
↧
Calauag’s Saba better and healthier with vermicomposting

“However, traditional culture of banana and other local cultivars has been unsystematic; backyard and subsistence level has no external input other than initial planting material and labor for occasional clearing and harvesting,” as stated by project leader Dr. Eduardo R. Lalas of the Quezon Agricultural Experiment Station (QAES).
Making saba organic and profitable through vermicomposting
To increase the farmers’ earnings through saba production optimization using the organic practice of vermicomposting, QAES in partnership with the Bureau of Agricultural Research (BAR) conducted the “Technology Commercialization of Vermicomposting for Saba Banana Plantation in Quezon Province”.
Previously, the Calauag local government unit implemented the “Restoring Local Agricultural Practices through Sustainable Agriculture”, a project which also promotes and supports the Organic Agriculture Act of the agriculture/" title="View all articles about Department of Agriculture here">Department of Agriculture (DA). These projects on organic agriculture made the town one of the “prime movers” in Quezon.
“[Part of] the components of the [QAES] project are the promotion and development of organic farming and construction of vermibeds,” explained Dr. Lalas. Vermicomposting utilizes earthworms as decomposers to produce high quality fertilizer in a short period. The organic wastes are collected and mixed in a vermibed and after the decomposition process, it turns into a nutrient-rich compost called vermicast.
Identifying the best substrate for saba vermicast
According to Dr. Lalas, the idea of the project is to utilize all the available substrates found in the farm. “We selected the kinds of substrates that are not costly and are readily available in the farms,” he added. In Tiaong, Quezon where QAES is located, the proponents made use of three substrates, madre de cacao leaves, neem leaves, and banana stalks. Meanwhile, they utilized the same substrates in Calauag except for the neem leaves which were replaced by maria-maria leaves instead.
The first phase of the project aimed to identify which of these substrates is the most helpful and cost-effective in procuring significant improvements in the quality of saba. The ratio of their vermicast is 75 percent substrate and 25 percent cow manure. After the soil analysis and comparative analysis conducted by QAES and the Regional Soils Laboratory, it was found that madre de cacao and neem produced the most favorable outcomes. But as observed by the proponents, madre de cacao is found almost anywhere in the locality making this substrate more economical for the farmers. Dr. Lalas also informed that if the objective is to rapidly reproduce the African Night Crawler (ANC), the best substrate to use is the banana stalks.
Commercializing and expanding the vermicomposting technology
Initially, three saba farmers from Brgy. Kigtan and Brgy. Viñas were identified as the project’s farmer cooperators. Staff from QAES assisted in setting up three vermibeds per farmer. From three farmers, the number of cooperators instantaneously expanded. “As of today, there are 16 vermicast production sites in 13 different barangays including the project sites in Kigtan and Viñas. Each unit has the capacity of producing 1,000 kg of vermicast in a year,” a promising result of the project as told by Dr. Lalas.
In 2011, all the project participants including the farmers, members of Municipal Agriculture and Fishery Council (MAFC) and DA staff underwent capacity-building trainings and seminars on vermicomposting. Among the topics discussed were cultural management practices, banana propagation, pest and disease management, and vermicomposting technology commercialization.
The vermicomposting sites in Barangays Pinagkamaligan, Kinalin Ibaba, Kalibo, Patihan, Pandanan, Anahawan, Sumilang, Sta. Milagrosa, Doña Aurora, Bantulino, Apad Lutao, Lagay, Tiniguiban, Kapaluhan, and the two project sites produced 5,601 tons of vermicast in January 2012. Seeing this notable outcome, QAES decided to raise the production to 26 tons which entails the establishment of ten more units.
Gaining more through vermicomposting
The farmer cooperators witnessed the significant improvements of their saba plantation and harvest through the use of vermicomposting. The plants became healthier-looking and more resistant to diseases. The yield also increased and the quality of harvest improved significantly.
Some farmer cooperators are already selling their vermicast and ANC worms to nearby locales and some are already producing vermitea, an organic liquid fertilizer brewed from the vermicast. “We are planning to expand the technology adoption in Tagkawayan, where there are portions planted with saba,” said Dr. Lalas. QAES will also impart the technology in all the local government units not only for banana production but also for other crops.
“In Calauag, vermicomposting is not utilized only in saba farms but also in Gulayan sa Paaralan,” said Dr. Lalas. The utilization of vermicast in Calauag won the municipality first place in District IV and second place in the provincial level of Developing Agriculture through Vegetable Production Integration Drive in School (DAVPIDS) (Gulayan sa Paaralan).
Through the technology commercialization of vermicomposting in Quezon, not only saba farmers but all farmers in general will surely continue to reap better harvest and higher income.
by Leila Denisse Padilla, www.bar.gov.ph
↧
↧
Cacao Production Guide

 Image: cocoalembrance.wix.com/[/caption]
According to statistics, the country's supply reached a deficit of 44,349 metric tons a year (2005) against local consumption. Production was then nearly 5000 metric tons in 2005. Local consumption then reached nearly 50,000 metric tons. There is indeed a large demand for local production of cocoa beans. With the present civil war happening in Ivory Coast which produces about 40% of the world's cacao, major buyers (mostly from the US and Europe) are seeking alternate supply elsewhere. Cacao is considered an equatorial crop (crops that thrives well on regions occupying the equator), the Philippines has a great potential growing cacao.
Selection of Varieties
There are many varieties of cacao but the National Seed Industry Council has registered and approved only 9 varieties/clones of cacao. NSIC approved clones are the following:
Some of the nine varieties are as follows:
Image: cocoalembrance.wix.com/[/caption]
According to statistics, the country's supply reached a deficit of 44,349 metric tons a year (2005) against local consumption. Production was then nearly 5000 metric tons in 2005. Local consumption then reached nearly 50,000 metric tons. There is indeed a large demand for local production of cocoa beans. With the present civil war happening in Ivory Coast which produces about 40% of the world's cacao, major buyers (mostly from the US and Europe) are seeking alternate supply elsewhere. Cacao is considered an equatorial crop (crops that thrives well on regions occupying the equator), the Philippines has a great potential growing cacao.
Selection of Varieties
There are many varieties of cacao but the National Seed Industry Council has registered and approved only 9 varieties/clones of cacao. NSIC approved clones are the following:
Some of the nine varieties are as follows:
-
- BR25 (CC-99-05)
|
-
- ICS 40
|
-
- UIT 1 (CC-99-02)
|
-
- K 1
|
-
- K 2
|
-
- S5
-
- UF 18
- Collect seeds only from ripe and healthy pods.
- Select seeds that are uniform in size. Discard seeds that are swollen and of different shape
- Select bigger seeds since the possibility high that they would produce vigorous and fast growing seedlings are high.
- Remove mucilage that covers the seeds by rubbing the seeds with sawdust or sand.
- Wash the seeds to effectively remove the mucilage.
- Cacao seeds are sensitive to fungal attacks and could lead to non-germination. It is best to soak cleaned seeds in fungicide solution for about 10 minutes. Follow strictly instructions indicated in labels.
- Spread the seeds on wet sacks and cover with wet newspaper for 24 hrs.
- Keep it moist but well ventilated to avoid formation of fungi.
- Start collecting seeds that show sign of germination (a pig tail-like root appears on one side). Usually, germination starts after two days.
- Sow the pre-germinated seeds not more than 1 cm deep in prepared polybags. Be sure seeds are sown with the pigtail-root pointed downwards.
- Use select 8" x 10" polybags. The soil must reach 2 to 3 cm from the top of the plastic bag.
- Potting medium
- mix completely composted organic materials to improve the soil characteristics such as water holding capacity, nutrient content and soil texture.
- If possible sterilize soil by boiling soil with water in drums or other convenient containers. In some cases, spraying formaline solutions also help sterilize soils. Cheapest way to sterilize soil is the use solar drying.
- Loamy to sandy loam soils are the most suitable medium in terms of physical property for raising seedlings.
- Liming is used for soils with less than pH 5
- Choose site which are near roads so that new roads will not be necessary
- Choose flat grounds. Work area must not entail more effort from uneven ground work place.
- Availability of quality water sources like good water table for shallow wells, presence of irrigation canals or other natural water source like river or creeks. Also, free from saline waters.
- Free from water-logging and presence of nearby drainage facilities
- For cacao seedlings, shading material is a must. 0 to 2 month old seedlings require 70 to 80% shade. However, gradual removal of shading is recommended to prepare seedlings for field planting. Shading materials may use materials in the vicinity of the nursery itself. This is to avoid additional expenditures.
- The period of keeping the seedlings in the nursery affects the arrangement of the bags. Polybag arrangement must be systematically carried out to facilitate maintenance and grafting. Normally, a twin row with alternate path of 45 cm in width is recommended. In order to enhance the seedling growth and to avoid the seedling etiolation, the seedlings are usually spaced further apart from each other when the seedlings are 2 to 3 months old.
- The distance is 25 to 30 cm apart starting from the middle point of the polybag. The distance gradually increases when the seedlings are kept in the nursery for a longer period.
-
- Weeding: Weeds do not normally cause problems in the nursery and those that appear can be removed without much expenditure on labor. On the other hand, weeds growing along spaces in between the blocks may be controlled by cutting down with scythes. The use of herbicide is not recommended. Therefore weeding could be done manually or by mulching with available materials such as rice hull.
-
- Fertilizer application is carried out after the first leaf hardens and should be based on the result of soil analysis. If analysis is not available, incorporate 15-35 grams of diammonium phosphate (18-48-0) per bag depending on the size of polybag. The use of granular fertilizer is also done when the leaves are dry to avoid leaf scorching.
-
- Culling/Selection: To ensure uniform growth and development of the seedlings to be planted in the field, cull out the poor-growing seedlings in the nursery. This practice may be carried out by removing the bags containing seeds which did not germinate and small, crinkled seedlings.
- Transplanting: To reduce the seedling shock during transplanting, it is necessary to rotate the polybag to a few degrees one week before field planting. It is done for the seedlings whose leaves have hardened and especially for those which roots have penetrated the ground. Watering has to be done for a few days later. Field planting must be started at the onset of the rainy season. Unless irrigation is available, field planting during the dry season is not advisable.
-
- Use healthy bud wood with active buds
- Use budwood within 2 days of collection and store and transport in moist and cool conditions
- Do not collect bud wood from trees that are recovering from heavy cropping\
- Make sure bud wood is of right age and thickness for the rootstock
- Only use a sharp knife and keep it only for grafting or budding- nothing else.
- Clean knives and secateuers and other tools with alcohol, before and after grafting and budding, to minimise disease transfer
- Do not place tools onto the ground
- Avoid grafting in very hot and very dry periods, and also in very wet periods.
- Make sure rootstock are the right age and condition for grafting and budding
- Manage shade and water very carefully
- Make a secure and evenly shaded nursery.
- Best soil is made-up of aggregated clay or loamy sand with 50% sand, 30-40% clay, and 10-20% silt.
- Deep soil, about 150 cm, highly favors the growth of cacao.
- pH = 5.0 to 6.5
- Ideal rainfall for cacao cultivation ranges from 1250 to 3000 mm per annum, preferably 1500-2000 mm with dry season of not more than 3 months.
- Temperature ideal for cacao lies between a mean maximum of 30-32°C and mean minimum of 18°C.
- Altitude of the area should lie between 300-1200 meters above sea level. Suitable temperature is generally found in an altitude up to 700 m.
- Cacao thrives best in areas under Type IV climate which has an evenly distributed rainfall throughout the year.
 Image: richfarmerpoorfarmer.blogspot.com[/caption]
In the case that shade crops (both temporary and permanent) do not create enough shade for cocoa seedlings growth, temporary structures can be made from other, easily available materials such as palm fronds, sugar cane leaf, and etc.
Image: richfarmerpoorfarmer.blogspot.com[/caption]
In the case that shade crops (both temporary and permanent) do not create enough shade for cocoa seedlings growth, temporary structures can be made from other, easily available materials such as palm fronds, sugar cane leaf, and etc.
| NAME | Filipino or common name |
| 1. PERMANENT SHADE PLANTS | |
| Leuceana | Ipil-ipil |
| Gliricidia | Madre de cacao (suitable pepper production) |
| Jackfruit | Langka |
| Lansones | Lansones |
| Marang | Marang |
| Durian | Durian |
| Cashew | Kasoy |
| Mango | Mangga |
| Longan | Longgan |
| Pomelo | Pomelo |
| Coconut | Niyog |
| 2. TEMPORARY SHADE PLANTS (fast growing) | |
| Sesbania | Sesbania |
| Crotalaria | Crotalaria |
| Flemingia | Flemingia |
| Cassava | Kamoteng kahoy or Balanghoy |
| Maize | Mais |
| Ginger | Luya |
| Abaca | Abaca |
| Papaya | Papaya |
| 3. VINES | |
| Pepper –black | Paminta |
| Dragon fruit | Dragon fruit |
| Vanilla | Vanilla |
| 4. GROUND COVERS AND MANURE CROPS | |
| Lemon grass | Tanglad |
| Peanut | Mani |
| Sweet potato | Kamote |
- Planting points are to be marked with stakes using suitable size and length of cable wire or guide from straight line planting.
- Most common distance :
- High density 1.5 to 2.0 x 6.0 m = 2,300 trees/ha. Double hedge row
- Low density = 3 x 2m = 1666 plants/ha or 2.5 x 2.5 m = 1600 plants/ha
- Depending on the shade from existing trees and tree crops, and soil fertility, the planting density of cocoa varies from 400-1100 plants/ha. In the case of intercropping in coconut and cashew, the density of cocoa averages about 600 plants/ha. Basal fertilizers are very important to enhance the growth of young cocoa trees in the establishment stage.
- Right time to plant is during early morning or late afternoon.
- It is not advisable to plant seedling with young and soft flush leaves as they are susceptible to sunburn, planting shocks or stress.
- Best season to plant in the field is during the onset of rainy season.
- Size of the hole should be big enough to accommodate the ball of the soil mass.
- Normally, a hole of 30 cm wide x 30 cm long and 30 cm deep.
- In holing, the surface of soil should be separated from the sub-soil.
|
Months after field planting |
FERTILIZER APPLICATION/PLANT (g) |
||
|
N |
P |
K |
|
| 1 | 6.4 | 6.4 | 6.4 |
| 4 | 8.5 | 8.5 | 8.5 |
| 8 | 8.5 | 8.5 | 8.5 |
| 12 | 12.8 | 12.8 | 12.8 |
| 18 | 17.0 | 17.0 | 17.0 |
| 24 | 27.0 | 27.3 | 38.5 |
| TOTAL | 80.5 | 80.5 | 91.7 |
- Reduce pest and diseases infestation
- Control the shape and height of the tree
- Control the shape and height of the tree, to ensure easy access for harvesting.
|
|
|
|
|
|
|
- Steps in Side Grafting
-
-
- Find the hard leaf flush from "super trees".
- Prepare budsticks for side grafting.
- Close-up of prepared budsticks.
- Make first horizontal deep cut on the main trunk of unproductive tree.
- Shave bark downward into the cut.
- Make sure original cut is through the bark to the white wood inside.
- Make two cuts downward from the horizontal cut.
- Create "window" by peeling the bark neatly and cleanly downward to reveal the white sapwood (cambium) inside.
- Insert budstick into window as illustrated
- Tie window closed with straw (younger tree).
- Here, graft is tied securely with straw (older tree).
-
-
- Cover side graft with plastic bag and tie tightly against the tree with raffia. Remove plastic bag after one month.
- Another younger tree with side graft covered with plastic bag and tied tightly against the tree with raffia. Remove plastic bag after one month.
- Repeat the same steps for the 2nd and 3rd. Each tree should have three grafts to begin with. Be sure each graft are at least 30 cms apart and opposite each other.
- Cut the main tree with chainsaw at least 1 foot above the ground in a slanting manner.
- Apply Tar or paint on the cut portion
- Ringweed the stump 1 ft. around and and apply animal manure or organic fertilizer in the stump holes.
- Apply organic fertilizer and control pest & diseases regularly.
 Image: doscst.edu.ph[/caption]
Pest and Disease Management
Most common cacao pests in the Philippines are: Cacao Pod Borer, Vascular Streak Dieback, Helopeltis and Cacao Stem Borer. Whereas, the most common cacao disease is Black Pod.
Image: doscst.edu.ph[/caption]
Pest and Disease Management
Most common cacao pests in the Philippines are: Cacao Pod Borer, Vascular Streak Dieback, Helopeltis and Cacao Stem Borer. Whereas, the most common cacao disease is Black Pod.
-
- Cacao Pod Borer (Conopormorpha cramelerella)
-
-
- Regular harvesting (weekly harvesting of all ripe pods) in order to break the lifecycle of the pest.
- Sanitation; which includes to bury all empty cacao pod husks, but also to remove all other diseased pods, black pods, and pods eaten by animals from the trees
- Pruning; to increase the sunlight, which the pest does not favor.
- Bagging or sleeving of the young pods with newspaper and stapler (or plastic bag)
- Fertilizer; to increase the general health of the tree and in addition increasing cacao production.
-
-
- Vascular Streak Dieback (caused by Oncobasidium theobromae)
-
-
- Sanitation pruning - cut off infected branches at 30 cm below the infected area, and burn the infested cuttings
- Nurseries should use polyethylene roofing to ensure spores cannot land on the seedlings
- Shade on the cacao trees should be reduced to lower humidity
- Plant VSD tolerant varieties such as hybrids PA 173 x SCA 9, PA 138 x SCA 9, ICS 39 x SCA 6, PA 156 x IMC 67, PA 156 x SCA 9, ICS 95 x SCA 6, clones PBC 123, PBC 159, ICS 95 and others.
-
-
- Black Pod Rot and Canker Control Method (caused by Phytophtora palmivora)
-
-
- Frequent harvesting to avoid pathogen sporulation.
- Harvest all the infested, dead and mummified pods and ideally destroy or bury them.
- Prune the cacao trees and shade trees to reduce humidity.
- Have a good drainage system so that the spores cannot spread in puddles of water.
- Trees that have died due to tree canker should be cut down and destroyed.
- Scraping off the bark from the infected area and put paint or soap on it.
-
-
- Helopeltis Control method (Helopeltis: a sap-sucking bud)
-
-
- Typically, Helopeltis likes open canopies and sunlight penetration. Still, one should prune the trees carefully and reduce shade if it is too heavy - this is to allow better visibility on the disease and better application of control methods. (Note: if pruning is too rigorous, new chupons will grow which are a feeding ground for Helopeltis).
-
- General sanitation of farm
- Regular harvesting
-
-
- Stem Borer Control Method (Zeuzera)
-
- Cut off infested braches at 40 cm below the lowest larvae hole. These branches should be destroyed.
- After pruning of an infested tree, big branches, especially those with stem borer holes, should be burned.
- The hole can be covered or plugged with mud or wood to prevent the larva to come out, so that it cannot feed and hatch, or cannot breathe.
- Poking the larvae out with a piece of wire.
- Squirt some soap solution in the exit hole. After a while, the larva will emerge from the hole, probably driven out by the unpleasant soap fume. Catch and kill the Stem Borer.
- Turn the bean mass after 2 days (48 hours) and 4 days (96 hours)
- Drain the juices (sweatings) from the bean mass
- Only use properly constructed wooden boxes with slats, or baskets
- Cover the beans with banana leaves and jute bags or cloth rags
- Fermentation will be completed in about 5- 6 days
- All mixing of beans should be made by wooden tools or hands
- Cover with plastic shelters during rain or remove the beans to a dry spot.
- During drying separate bean clusters, remove pod placenta, and flat, damaged or germinated beans.
| Avoid using wood fired kilns that produce smoke- this is not an approved drying method and will result in smoke contaminated cocoa! |
↧
Japanese entity adopted BAR’s Edible Landscaping program that encourages households to plant organic vegetable, raise food security

Dr. Fernando C. Sanchez (left) of UPLB shows to BAR Director Nicomedes P. Eleazar (right) the components of the demo garden launched during BAR’s twenty-fourth anniversary.[/caption]
The EL, a partnership between BAR and University of the Philippines Los Banos (UPLB), has generated adopters including the Organization for Industrial, Spiritual, and Cultural Advancement (OISCA) of Japan.
Its aesthetic value and food security aims are hoped to have a significant impact locally.
“Edible landscaping may not be totally for commercial profitability. But it will raise consumption of vegetables and enhance food security. And we have an organic growing system that’s good for health and environment,” according to UPLB EL Project Leader Farnando C. Sanchez Jr.
BAR had budgeted P1 million for the first phase of the technology promotion of EL which initially had its site at the UPLB CA-Agripark.
“Instead of planting just ornamental plants, we want to encourage more households to plant vegetables in their front and back yards so we may provide for our homes’ basic needs, and we may be able to reduce our imports of vegetables,” said BAR Director Nicomedes P. Eleazar.
A United Nations data quoted by the Factfish indicated that as of 2012 the Philippines had vegetable imports of $3.013 million (P142 million).
This project can have extensive livelihood opportunity wherever people want to keep healthy and eat fresh, organic vegetables.
“It offers an opportunity for about 34.2 percent of the total household population or 5.2 million families of the country that live below the poverty threshold especially for families in the cities that cannot afford the high cost of basic needs as food,” according to a BAR-UPLB report.
Value addition
OISCA, a Tokyo-based organization established by Rev. Yonosuke Nakano, has already been engaged in vegetable planting even before it took up EL.
Its EL farm is in Tiaong, Quezon.
OISCA had a value addition in its vegetable farming from BAR-UPLB’s EL as the beautification function of its farm enhances attraction of young farmers into agriculture.
EL also enhances the environment as the greeneries avert emission of more carbon dioxide that contributes to global warming and climate change.
When it was founded in the Philippines in 1961, OISCA’s aim was to bring Japanese agriculturists to the Philippines to train Filipinos on agriculture.
OISCA as of 1983 had sent 336 Japanese agricultural experts to the Philippines and 245 Filipinos to Japan.
The EL’s two phases were implemented from November 2009 to September 2012.
Economic value
Aside from potentially helping reduce the country’s vegetable imports, the EL has economic value for agritourism. Agritourism sites can charge visitors an entrance fee.
One agritourism model is that of the Benguet State University (BSU) which generates around P2 million yearly from its tourist site in its campus in Benguet. It is planted with organic strawberry and Arabica coffee. BSU charges P50 per entrant.
Aside from OISCA, the EL of BAR-UPLB has been demonstrated in the gardens of several institutions. These include a Rotary Club of Los Banos-assisted public school, UP Rural High School, and even at BAR’s own office site on Visayas Avenue, Quezon City.
Since EL was introduced by UPLB in 1999, EL was also adopted by a Laguna provincial program called “Food Always in the Home” which popularized vegetable gardening.
“Sooner some private companies adopted the same concept for their model nurseries. A real estate developer incorporate dthe concept for its farm lot subdivision in Tarlac, “ according to the BAR-UPLB’s “Technology Promotion and Commercialization of Edible Landscaping” (TP-CEL).
In Antipolo, in an aim to orient children who are now mostly ignorant on agriculture, a resort has also used edible landscaping as a better alternative to planting ornamental plants.
The concept of EL was presented at the Flora Filipina Conference in Manila in January 2009.
Malnutrition
BAR has been supporting projects that boost consumption of vegetables in the country which is known to be among the lowest in Asia.
The World Health Organization (WHO) indicated the Philipines’ vegetable consumption of 60 kilos per person per year in 2007 was one of Asia’s lowest, reported the UN Office for the Coordination of Humanitarian Affairs.
This results in chronic malnutrition especially in children with shortage in people’s intake of vitamins and minerals. The National Nutrition Survey (NNS) of 2008 reported 33 percent of Filipino children less than 10 years old were too short for their age classification. Stunting also affects 29 percent of five-year-olds.
NNS reported the Philippines’ average daily consumption per person of 110 grams of vegetables as of 2008 was lower than the 145 grams consumption in 1978.
Furthermore, consumption of fruits was also lower as of 2008 at 54 grams per person per day compared to 104 grams in 1978.
BAR and the Department of Agriculture previously had campaigns on raising Philippines’ vegetable consumption.
One of these was the “Oh My Gulay” which was implemented with the East and Southeast Asia of the World Vegetable Centre (AVRDC) based in Taiwan.
This program aimed to support health programs on reduction of incidence of vitamins and minerals that are linked to contraction of heart diseases, cancers, diabetes, and other degenerative disease.
The country’s vegetable consumption is even far lower than WHO’s recommendation of 400 grams of vegetables and fruits per person per day or 150 kilos per year.
High-priced
One of the reasons for low vegetable consumption may be the high price of vegetables.
Most vegetables are produced in farflung upland areas like Baguio and Nueva Vizcaya so that most urban residents do not have access to affordable vegetable.
“Vegetables and fruits can be more expensive than fish in the Philippines, and their prices fluctuate a lot,” according to Sheila Aclo de Lima of the AVRDC. “With these (space-friendly) methods (like container farming), underprivileged families can produce for themselves, and their vegetable and fruit consumption is resilient to weather and food crises.”
Design
The EL project is not only about how to grow organic vegetables but on planning, design, and implementation of a landscape architecture program.
“Edible plants can provide the texture, color, and mass that we like to see in our garden as some of them are fine, dainty and lay, bright and attractive, tall growing or in prostate forms,” according to the TP-CEL report.
EL farms may have different shapes for the plots rather than just rectangular. These may be shaped as a circle, moon-shaped, square, or heart-shaped.
“A trellis does not need to be flat on top. Rather it can be in arch form or tunnel form to inject some novelty and excitement.”
An EL farm does not have to be very big. At the UPLB CA AGripark, the technology demonstration area was 2,900 square meters. At BAR’s building, the area only covered 10 by four meters or a total of 40 square meters.
A staff has to be hired to maintain the gardens at the CA AGripark. They have been trained to implement in the EL farms calendared planting, soil amendment, composting, companion cropping or best crop combinations, seedling production, chemical-free or organic vegetable production, and horticultural practices.
Pinakbet
The CA Agripark had a Pinakbet Garden planted with the vegetables Ilocanos love like eggplant, ampalaya, camote. It had a Sinigang Garden planted with radish, okra, eggplant, tomato, gabi, and kangkong. It had a Kamote Kaleidoscope with different kamote varieties of different colors and interesting shapes, and Salad Republic (lettuce, tomato, chives, celery, chicharo and onion).
A Fruit Tree Miracle garden had miracle fruits like kalamansi, guava, chico, kalamias, and papaya.
The Herbs Garden had basil, tarragon, mint, viola, oregano, gainura, and gotokola.
Urban gardening or container gardening is encouraged in EL so that city dwellers may take advantage of the technology.
Any commercially available recyclable plastic container, clay pots, coconut shells, and other commonly available materials were used as pots to demonstrate to many that one does not have to have rich resources to put up this garden.
Those planted in these containers are lemon grass, gainura, lettuce, mustard, and pechay.
To enhance beautification, the perimeter fence at CA AGripark was planted with different vines like ampalaya, upo, patola, cucumber, and singkamas.
Factors
Factors to consider in the choice of plants are nutrition, preference, color, texture, scent and attractive physical characteristics.
While one expects to see mostly plants in EL particularly vegetables (called softscapes), hardscapes are needed to beautify an EL farm. These are trellises, signage, pots and containers, waterfalls, and lights.
The TP-CEL had listed several indigenous fruit trees in the country that have potential use for EL.
These are abiu, alingaro, ambarella, araza, ardisia, bago or melinjo, batuan, bitungol, black palm, Brazil cherry, chico-mamey, eleagnus, galo, guava, mulberry, Indian, Philippine chestnut, pitomba, and raspberry bush, among others.
Versatile
While one initially thinks EL may have limited applications, as he investigates he is surprised that it has vast applications. It includes that for home, commercial, and humanitarian purposes. It can be in homes, parks, schools, business and government offices, and industrial sites.
Instead of chemical fertilizers, organic fertilizers are recommended in EL sites.
To repel some types of insects, marigold, onion, and garlic are planted around the garden such as on walkways or around perimeter walls.
Some insects are also repelled with the use of chili and soap sprayed on plants. Bagging of fruits using paper, plastic, and other innovative materials is encouraged to prevent infestation.
Pruning or thinning out of flowers, fruits, and leaves not only enhances plant shape but also its fruiting productivity.
Ratooning, retaining the plant from new emerging roots, is also practiced as it saves replanting and fast growth compared to growing plants from new seeds. Kangkong is one of those that are being rationed.
Commercial farms aim to harvest massive plants at the same time in order to achieve economies of scale.
However, EL is ideal for staggered harvesting which is ideal for small consumption in families.
###
For any questions kindly contact Dr. Fernando Sanchez (UPLB), 0917-500-4035, Ms. Mara Valdeabella (BAR), 928-8505; for interview requests Ms. Analiza C. Mendoza, 0921-338-3816, 0916-266-6604 (Growthmagph).
↧
Dr. Henry Lim Bon Liong Launches Rice Bucket Challenge
Inspired by the popular “Ice Bucket Challenge” that went viral on social media last month, a socially relevant version is now making its wave in India – the” Rice Bucket Challenge” where it encourages people to donate rice to the poor families in ” bucket or packet” form. Pioneering the Rice Bucket Challenge in the [&hellip
↧
Grafting effective in producing off-season tomato

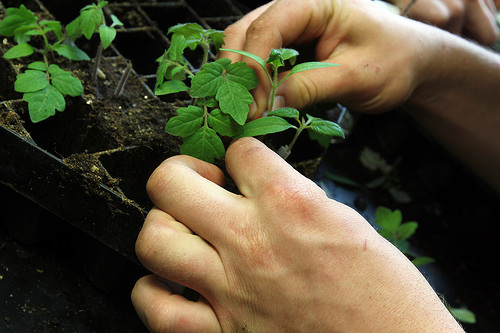 Photo by Sterling College[/caption]
In a study conducted by Dr. Lun G. Mateo and his group at the Central Luzon State University (CLSU), they found that grafting is an effective strategy to produce varieties of tomato that can withstand off-season production constraints. Two tomato hybrids, Apollo and CLN5915, were grafted to two different rootstocks, EG 203 (an eggplant) and H7996 (a tomato variety). Both rootstocks are known to be resistant to bacterial wilt, a highly devastating disease caused by Ralstonia solanacearum.
The researchers placed the grafted Apollo and CLN5915 seedlings in a compartment with a relative humidity (amount of water vapor in the air) approximately at 85-90% for a week. The newly grafted seedlings were then transferred into another chamber prior to transplanting. The planting beds were raised to 30 cm high and provided with rainshelter using 32-mesh plastic net. This was done to protect the seedlings from heavy rainfall and damage caused by waterlogged soil. Significant results from the two-year experiment revealed that the two grafted tomato seedlings showed higher percentage of survival compared to non-grafted plant. Grafted Apollo and H7996 had 97.2 and 77.8 survival percentage, respectively. On the other hand, non-grafted Apollo plant had zero percent survival. As to the ability to resist bacterial wilt, grafted varieties showed high percentage of survival (97.2%), while non-grafted plants had 70.8 survival percentage.
In terms of yield performance, grafted Apollo to EG 203 yielded an approximate of 13.1 tons/hectare, while Apollo seedlings grafted to H7996 yielded 11.7 tons/hectare, and the non-grafted plants yielded only 1.3 tons/hectare.
In an effort to integrate advances in grafting technology, a similar study was conducted by James R. Burleign at the Asian Vegetable Research and Development Center in Taiwan and Christian Ulrichs at the Technical University of Munich in Germany. The results of their studies can be very useful to determine the limitations and advantages of grafting technology when used under different environmental conditions.
Photo by Sterling College[/caption]
In a study conducted by Dr. Lun G. Mateo and his group at the Central Luzon State University (CLSU), they found that grafting is an effective strategy to produce varieties of tomato that can withstand off-season production constraints. Two tomato hybrids, Apollo and CLN5915, were grafted to two different rootstocks, EG 203 (an eggplant) and H7996 (a tomato variety). Both rootstocks are known to be resistant to bacterial wilt, a highly devastating disease caused by Ralstonia solanacearum.
The researchers placed the grafted Apollo and CLN5915 seedlings in a compartment with a relative humidity (amount of water vapor in the air) approximately at 85-90% for a week. The newly grafted seedlings were then transferred into another chamber prior to transplanting. The planting beds were raised to 30 cm high and provided with rainshelter using 32-mesh plastic net. This was done to protect the seedlings from heavy rainfall and damage caused by waterlogged soil. Significant results from the two-year experiment revealed that the two grafted tomato seedlings showed higher percentage of survival compared to non-grafted plant. Grafted Apollo and H7996 had 97.2 and 77.8 survival percentage, respectively. On the other hand, non-grafted Apollo plant had zero percent survival. As to the ability to resist bacterial wilt, grafted varieties showed high percentage of survival (97.2%), while non-grafted plants had 70.8 survival percentage.
In terms of yield performance, grafted Apollo to EG 203 yielded an approximate of 13.1 tons/hectare, while Apollo seedlings grafted to H7996 yielded 11.7 tons/hectare, and the non-grafted plants yielded only 1.3 tons/hectare.
In an effort to integrate advances in grafting technology, a similar study was conducted by James R. Burleign at the Asian Vegetable Research and Development Center in Taiwan and Christian Ulrichs at the Technical University of Munich in Germany. The results of their studies can be very useful to determine the limitations and advantages of grafting technology when used under different environmental conditions.
------------------------------- For more information, please contact: Dr. Lun G. Mateo, Dennis R. Cacho, Anacleto F. Bala, Central Luzon State University, Muñoz, Nueva Ecija. Tel. No. (044)-456-0704)
By: Mary Charlotte O. Fresco, BAR Digest, April-June 2001 Issue (Vol. 3 No.2)
↧
↧
Cashew Production Guide

 The cashew plant is an evergreen tree that grows up to 12 meters tall, with a dome-shaped crown or canopy bearing its foliage on the outside, where flowers and fruits are found.
The growth of the taproot reaches a depth of 1.5-2 times the height of the plant during the first 4 months. Extensive lateral roots are formed later and reach far beyond the canopy spread of the tree during the first year of growth. In mature trees, the root volume is generally confined within the tree canopy. Very few laterals are formed beyond the 6 meter drip-line of the tree.
The fruit has a kidney-shaped nut, about 3 cm x 1.2 cm attached to a much enlarged and swollen pedicel or receptacle forming the fruit-like cashew apple. The cashew apple is pear-shaped, 10-20 cm x 4-8 cm, shiny, red to yellow, soft, and juicy. The seed is kidney-shaped, with reddish-brown testa, two large white cotyledons, and a small embryo. The kernel remaining after the removal of the testa is the cashew nut of commerce.
Favorable Growing Conditions
It can grow successfully in areas with a very distinct dry season or where the annual rainfall is as low as 50 cm. It can likewise grow well in areas with high levels of rainfall (as much as 350 cm annually) provided the soil is well-drained.
Seed System
1. Nursery Site
The nursery site should be well-drained and exposed to sunlight. It should have a good source of irrigation water for the maintenance of the plant materials. It should be protected against stray animals.
2. Nut Selection
Nuts for planting should be obtained from mother trees of known performance. They should be fully matured and of high density (heavy) grade to ensure good germination and vigorous seedlings. Seeds are water tested; those that sink are chosen since they have higher viability and germinate quickly.
3. Sowing the Seeds
Cashew seeds expire easily. Dry and newly collected seeds must be sown/propagated as soon as possible to prevent loss in viability. They are sown on individual polyethylene bags containing an equal mixture of fine sand and organic matter.
Seeds are sown 5-10 cm deep with stalk end facing upward in slanting position. This prevents the emerging cotyledons at the soil surface from being destroyed by rats, ants, snails, and birds.
4. Care of Seedlings
Seeds will germinate within 1 to 2 weeks after sowing. Excessive watering should be avoided. If seedlings are week and stunted, urea solution at the rate of 10 tbsp per gallon of water should be applied.
The seedlings must be properly taken care of until they are ready for field planting or for use in asexual propagation (grafting). Seedlings are ready for field planting when they have attained a height of 20-50 cm.
5. Propagation
Cashew can be propagated sexually or asexually. Asexual propagation can be done through airlayering, inarching, marcotting or grafting. Grafting is the best method for large-scale asexual propagation of cashew.
With cleft grafting, the seedlings are cut in traverse section (crosswise) and the remaining stem is cut longitudinally (lengthwise). The scion from a selected mother tree cut into the shape of a wedge is put between the two separated parts of the stem of the seedling, and the seedling and the scion are then wrapped with a plastic ribbon.
Up to 100% success has been obtained with 10-week old seedlings. In Palawan, plant propagators can get an average of 95% success in cleft grafting.
The use of young seedlings of about two months old result in more rapid takes, and the plants are ready to be planted at the age of 3 ½ months.
Sexual propagation is done by sowing the seeds directly on individual polyethylene bags. It should be done during the dry season so that the seedlings could be planted in the field at the start of the rainy season.
Land Preparation
For commercial purposes, the land should be thoroughly prepared. Plow the area 2-3 times followed by harrowing until the desired tilth of the soil is attained. It should be done before the start of the rainy season. For backyard or reforestation purposes, just underbrush the area and if possible collect all cut grasses, shrubs, and other rubbishes and burn them. The soil should be cultivated properly in order that the seeds may be sown with the required depth or that holes may be dug deep enough to bury the ball of seedlings. Rows of cashew trees should be properly laid out with the proper distancing by placing markers at the desired distance between hills in a row before digging the holes.
Crop Establishment
1. Distance of planting
Distance of planting varies according to the purpose for which the trees are planted. For reforestation, 3m x 3m is recommended to encourage early shading and to aid in smothering weeds.
For commercial plantings in the Philippines use 6m x 6m which is too close compared to the practice in other countries.
Triangular planting was found to be most productive layout and should be tried. This method, however, is rather difficult for farmers to follow.
High density planting gives more kernel per hectare up to age 7 years. Low density planting gives less per hectare but more per tree.
a. Triangular (12m x 12m x 12m) = 79 plants/ha
An alternative and easier method is the quincunx arrangement and should also be tried.
b. Quincunx (15m x 15m) = 76 plants/ha
c. Square
The simplest recommended planting distances are 9m x 9m at the less fertile lower slopes and 10m x 10m at the more fertile lower slopes.
2. Lining, Stacking and Digging of Holes
Rows of cashew should be properly laid out by placing markers between rows and between hills in a row.
The holes should be dug a month before the planting of seedlings. The holes should have a dimension 20 cm x 20 cm.
3. Planting Time
In places with distinct dry and wet seasons, planting is best done at the start of the rainy season.
4. Planting
There are two methods of establishing cashew that may be employed. These are direct seeding and transplanting of seedlings or sexually propagated materials.
In direct seedlings, 2 to 3 seeds are planted 5-10 cm deep with the stalk end facing upward and in a slanting position. This prevents emerging cotyledons at the soil surface from the ravages of field rats, ants, snails and birds.
Seeds are planted 30 cm apart in a triangular position when 3 seeds are used. The seeds will germinate 1-2 weeks after sowing provided that the soil has sufficient moisture.
Thinning should be done leaving only the most vigorous plant to develop 1-2 months from germination. Thinning is preferably done during the start of the rainy season.
When transplanting seedlings or sexually propagated materials, remove carefully the polyethylene plastic before setting the seedlings in the holes.
Fill the holes with surface soil first and firm the soil at the base of the seedling carefully allowing the roots to remain in as natural as possible.
5. Weeding and Cultivation
The plants should be cultivated and free from weeds at a distance of 1 meter around the trunk. The orchard should be weeded as often as necessary. Cut grasses should be left in the area between the hills to dry and to used later for mulching. Mulching helps conserve moisture around the plant during the summer months, keep down the weeds and increase the amount of humus in the soil when decays.
6. Intercropping and Covercropping
A considerable part of the land is available for intercropping during the early years after the establishment of the cashew orchard.
To provide sufficient protection from the heavy growth of weeds and grass, the spaces between rows may be used for planting cash crops. This would enable the grower to earn additional income.
Annual crops can be interplanted between rows of cashew provided they are not closer than 2 meter from the cashew tree.
When the growing of intercrops is no longer feasible, the field should be planted to leguminous covercrops. The planting of covercrops will prevent further soil erosion, conserve moisture, and add organic matter to the soil. The area within 1 to 1 1/2 meters from the trunk should be kept free from weeds and covercrops should not be allowed to cling to the tree.
7. Pruning
Little pruning is practiced in cashew. However, it may be necessary to prune regularly to get the desirable shape of the tree and to facilitate cultural operations.
It is also necessary to remove the diseased and infected branches and unnecessary water sprouts.
It is also necessary to remove the diseased and infected branches and unnecessary water sprouts.
8. Cut wounds should be properly treated with chemicals (coaltar) to facilitate healing and avoid infections.
Nutrient Management
It is advisable to apply fertilizers especially when soil analysis dictates specific soil nutrient deficiencies.
The general recommendations are the following:
Seedlings - At planting time apply complete fertilizer (14-14-14) before the seedlings are set in the holes at the rate of 200-300 gm/plant.
Young Trees - Apply complete fertilizer at the rate of 300-500 gm/tree plus Urea (45-0-0) at the rate of 200-300 gm/tree.
Bearing Trees - Apply complete fertilizer (14-14-14) at the rate of 1.5 to 3.0 kg/tree.
Recommended rate of fertilizer application is applied two times a year. One half of the total requirement per tree should be applied at the start of the rainy season and the remaining half should be applied toward the end of the rainy season.
On established trees, fertilizer should be dug with a depth of 1-10 cm. The fertilizer is then distributed equally. Cover the holes/canal properly with soil to prevent the fertilizer from evaporating or from being washed out by heavy rains.
Water Management
Irrigation is needed during the first dry season. Unlike in the subsequent years, when the root system has already been established and have reached the layer with sufficient moisture. For better yield, it is advisable to irrigate the field regularly especially during summer.
Pest Management
Major Pests
Twig Borer (Niphonoclea albata N. /N. capito P.)
This insect pest are common during the dry season. The adult beetle girdles the small branches causing them to dry up or break and drop to the ground. Its creamish larvae bore into the pith of the branches. As they feed, they move downward until they pupate. All affected twigs and small branches may eventually die.
Control Measure: Remove or collect all affected twig as well as dried twigs on the ground. Dispose them properly by burning before applying chemical sprays. In using spray chemicals, mix 3-5 tbsp of Malathion, Carbaryl and/or Methyl Parathion per 5 gallons of water. Repeat application at 7-10 days interval when necessary.
Mealybugs (Gray Mealybugs - F. vigata) and Thrips (Red-banded thrips - Selen othrips rubrocintus Glard)
These pests sucks the sap of young leaves and shoots. When severe infestation occurs, the tree is weakened and the leaves and fruit may fall prematurely.
Control Measures: Spray trees with any insecticide commonly available at manufacturer's recommended dosage when there are signs of early infestation.
Leaf Miner (Acrocercops syngramma M.) - Young plants in the nursery and in the orchard are more affected by these pests. Caterpillars of this silvery gray moth mine through the tender leaves, thus, severely damaging them.
Control Measures: Spray 0.05% Phosphamidon at manufacturer's recommended dosage as soon as infestation is detected on new leaves.
Tea Mosquito (Helopeltis Antonil S.) - A reddish-brown mirid bug which normally appears at the time of emergence of new growth and panicles. Nymphs and adults suck the sap from tender nuts.
Control Measures: Spray Malathion, Phosphamidon and/or Endosulfan at emergence of new growth and inflorescence. A third spray may be done at the time of fruit setting to reduce immature fruit drops.
Saw-Toothed Grain Beetle (Cryzaephillus surinamensis L.) - This pest is known to attack the nuts during storage.
Control Measures: Nuts should be thoroughly dried and placed in air tight containers. Surface treatment is recommended. For finished products, fumigation is recommended.
Slug Caterpillar (Lamantridae spp.) - The caterpillar feeds on the leaves causing semi-defoliation.
Termite - Termites attack the roots and the trunk of cashew trees. They burrow on the bark of roots and branches especially of old trees. They build their soil mounds or nest on dead parts of the tree.
Control Measures: Soil mounds must be destroyed to locate the queen termite. The queen should be killed either mechanically or by spraying with 2% Chlordane. Chlordane should not be applied on living parts of the tree because of its long residual effect. Cistin powder could be applied to any part of the tree infested with termites at the rate recommended by the manufacturer.
Major Diseases
Dieback or Pink Disease - This disease is caused by fungus Corticium salmonicolor B. that usually occurs during the rainy season. Affected shoots initially show white patches on the bark; a film of silky thread or mycelium develops. Later, the fungus develops a pinkish growth which are the spores that make the bark split and peel off. Affected shoots start drying up from the tip.
Control Measures: All possible sources of innoculum should be removed. Affected shoots are pruned and burned. Cut surfaces must be protected by applying Bordeaux moisture paste. The tree should also be sprayed with fungicide at manufacturer's recommended dosage.
Anthracnose - This disease is cause by fungus Collectorichum gloeospoides that usually infect tender leaves, shoots, inflourescences, young fruits (apples) and young nuts. This disease is most prevalent when there is excessive rainfall coinciding with the appearance of new growth and flowering. Infected parts in its early stage show shiny, watersoaked lesions which later turn reddish-brown. At the lesion site, resinous exudation can be seen. As the disease progresses, the lesions enlarge in size, all affected tender leaves wrinkle, and the young apples and nuts become shrivelled. Inflorescences become black.
Control Measures: Remove all infected parts (source of innoculum) before spraying the tree with fungicide at manufacturer's recommended dosage of application.
Damping-off - This disease is caused by fungus Fusarium. This disease normally occurs in the nursery and effects cashew seedlings especially when the soil medium gets too wet.
Control Measures: Seeds for planting should be treated with Arasan 75 at the rate of ¼ tsp per ganta of seeds before sowing. Soil media for potting should be treated with soil fumingants.
Harvest Management
In the Philippines, cashew trees flower from November to March, while the harvest season is from February to May and may extend up to early June. The quality of nuts and yield is dependent on weather conditions during the fruiting stage. If it rains during the reproductive phase, poor quality nuts are produced. Fruits are usually harvested manually, although a number of farmers wait for the fruits to drop as the main concern of farmers is the nut. Nuts are picked from the ground, separated from the cashew apple, cleaned and dried.
In places where cashew apples are processed into juice, wine and other delicacies, fruits are harvested using a pole with a wire hook attached to its end. The pole is provided with a shallow net or cloth bag to catch the detached fruits.
Processing and Utilization
Nuts are roasted and eaten. At present, the only commercial scale use for the cashew apple is for livestock feed. However, the cashew apple is now being processed into juice, candy, wine, jam, etc. but only to a certain extent since the market for these end products is still in the development stage.
Sources of Cashew Planting materials
Palawan Seed Farm
Puerto Princesa City
Bureau of Plant Industry Nursery
Visayas Avenue, Quezon City
Guimaras Seed Farm
Jordan, Guimaras, Iloilo
Source: bar.gov.ph
The cashew plant is an evergreen tree that grows up to 12 meters tall, with a dome-shaped crown or canopy bearing its foliage on the outside, where flowers and fruits are found.
The growth of the taproot reaches a depth of 1.5-2 times the height of the plant during the first 4 months. Extensive lateral roots are formed later and reach far beyond the canopy spread of the tree during the first year of growth. In mature trees, the root volume is generally confined within the tree canopy. Very few laterals are formed beyond the 6 meter drip-line of the tree.
The fruit has a kidney-shaped nut, about 3 cm x 1.2 cm attached to a much enlarged and swollen pedicel or receptacle forming the fruit-like cashew apple. The cashew apple is pear-shaped, 10-20 cm x 4-8 cm, shiny, red to yellow, soft, and juicy. The seed is kidney-shaped, with reddish-brown testa, two large white cotyledons, and a small embryo. The kernel remaining after the removal of the testa is the cashew nut of commerce.
Favorable Growing Conditions
It can grow successfully in areas with a very distinct dry season or where the annual rainfall is as low as 50 cm. It can likewise grow well in areas with high levels of rainfall (as much as 350 cm annually) provided the soil is well-drained.
Seed System
1. Nursery Site
The nursery site should be well-drained and exposed to sunlight. It should have a good source of irrigation water for the maintenance of the plant materials. It should be protected against stray animals.
2. Nut Selection
Nuts for planting should be obtained from mother trees of known performance. They should be fully matured and of high density (heavy) grade to ensure good germination and vigorous seedlings. Seeds are water tested; those that sink are chosen since they have higher viability and germinate quickly.
3. Sowing the Seeds
Cashew seeds expire easily. Dry and newly collected seeds must be sown/propagated as soon as possible to prevent loss in viability. They are sown on individual polyethylene bags containing an equal mixture of fine sand and organic matter.
Seeds are sown 5-10 cm deep with stalk end facing upward in slanting position. This prevents the emerging cotyledons at the soil surface from being destroyed by rats, ants, snails, and birds.
4. Care of Seedlings
Seeds will germinate within 1 to 2 weeks after sowing. Excessive watering should be avoided. If seedlings are week and stunted, urea solution at the rate of 10 tbsp per gallon of water should be applied.
The seedlings must be properly taken care of until they are ready for field planting or for use in asexual propagation (grafting). Seedlings are ready for field planting when they have attained a height of 20-50 cm.
5. Propagation
Cashew can be propagated sexually or asexually. Asexual propagation can be done through airlayering, inarching, marcotting or grafting. Grafting is the best method for large-scale asexual propagation of cashew.
With cleft grafting, the seedlings are cut in traverse section (crosswise) and the remaining stem is cut longitudinally (lengthwise). The scion from a selected mother tree cut into the shape of a wedge is put between the two separated parts of the stem of the seedling, and the seedling and the scion are then wrapped with a plastic ribbon.
Up to 100% success has been obtained with 10-week old seedlings. In Palawan, plant propagators can get an average of 95% success in cleft grafting.
The use of young seedlings of about two months old result in more rapid takes, and the plants are ready to be planted at the age of 3 ½ months.
Sexual propagation is done by sowing the seeds directly on individual polyethylene bags. It should be done during the dry season so that the seedlings could be planted in the field at the start of the rainy season.
Land Preparation
For commercial purposes, the land should be thoroughly prepared. Plow the area 2-3 times followed by harrowing until the desired tilth of the soil is attained. It should be done before the start of the rainy season. For backyard or reforestation purposes, just underbrush the area and if possible collect all cut grasses, shrubs, and other rubbishes and burn them. The soil should be cultivated properly in order that the seeds may be sown with the required depth or that holes may be dug deep enough to bury the ball of seedlings. Rows of cashew trees should be properly laid out with the proper distancing by placing markers at the desired distance between hills in a row before digging the holes.
Crop Establishment
1. Distance of planting
Distance of planting varies according to the purpose for which the trees are planted. For reforestation, 3m x 3m is recommended to encourage early shading and to aid in smothering weeds.
For commercial plantings in the Philippines use 6m x 6m which is too close compared to the practice in other countries.
Triangular planting was found to be most productive layout and should be tried. This method, however, is rather difficult for farmers to follow.
High density planting gives more kernel per hectare up to age 7 years. Low density planting gives less per hectare but more per tree.
a. Triangular (12m x 12m x 12m) = 79 plants/ha
An alternative and easier method is the quincunx arrangement and should also be tried.
b. Quincunx (15m x 15m) = 76 plants/ha
c. Square
The simplest recommended planting distances are 9m x 9m at the less fertile lower slopes and 10m x 10m at the more fertile lower slopes.
2. Lining, Stacking and Digging of Holes
Rows of cashew should be properly laid out by placing markers between rows and between hills in a row.
The holes should be dug a month before the planting of seedlings. The holes should have a dimension 20 cm x 20 cm.
3. Planting Time
In places with distinct dry and wet seasons, planting is best done at the start of the rainy season.
4. Planting
There are two methods of establishing cashew that may be employed. These are direct seeding and transplanting of seedlings or sexually propagated materials.
In direct seedlings, 2 to 3 seeds are planted 5-10 cm deep with the stalk end facing upward and in a slanting position. This prevents emerging cotyledons at the soil surface from the ravages of field rats, ants, snails and birds.
Seeds are planted 30 cm apart in a triangular position when 3 seeds are used. The seeds will germinate 1-2 weeks after sowing provided that the soil has sufficient moisture.
Thinning should be done leaving only the most vigorous plant to develop 1-2 months from germination. Thinning is preferably done during the start of the rainy season.
When transplanting seedlings or sexually propagated materials, remove carefully the polyethylene plastic before setting the seedlings in the holes.
Fill the holes with surface soil first and firm the soil at the base of the seedling carefully allowing the roots to remain in as natural as possible.
5. Weeding and Cultivation
The plants should be cultivated and free from weeds at a distance of 1 meter around the trunk. The orchard should be weeded as often as necessary. Cut grasses should be left in the area between the hills to dry and to used later for mulching. Mulching helps conserve moisture around the plant during the summer months, keep down the weeds and increase the amount of humus in the soil when decays.
6. Intercropping and Covercropping
A considerable part of the land is available for intercropping during the early years after the establishment of the cashew orchard.
To provide sufficient protection from the heavy growth of weeds and grass, the spaces between rows may be used for planting cash crops. This would enable the grower to earn additional income.
Annual crops can be interplanted between rows of cashew provided they are not closer than 2 meter from the cashew tree.
When the growing of intercrops is no longer feasible, the field should be planted to leguminous covercrops. The planting of covercrops will prevent further soil erosion, conserve moisture, and add organic matter to the soil. The area within 1 to 1 1/2 meters from the trunk should be kept free from weeds and covercrops should not be allowed to cling to the tree.
7. Pruning
Little pruning is practiced in cashew. However, it may be necessary to prune regularly to get the desirable shape of the tree and to facilitate cultural operations.
It is also necessary to remove the diseased and infected branches and unnecessary water sprouts.
It is also necessary to remove the diseased and infected branches and unnecessary water sprouts.
8. Cut wounds should be properly treated with chemicals (coaltar) to facilitate healing and avoid infections.
Nutrient Management
It is advisable to apply fertilizers especially when soil analysis dictates specific soil nutrient deficiencies.
The general recommendations are the following:
Seedlings - At planting time apply complete fertilizer (14-14-14) before the seedlings are set in the holes at the rate of 200-300 gm/plant.
Young Trees - Apply complete fertilizer at the rate of 300-500 gm/tree plus Urea (45-0-0) at the rate of 200-300 gm/tree.
Bearing Trees - Apply complete fertilizer (14-14-14) at the rate of 1.5 to 3.0 kg/tree.
Recommended rate of fertilizer application is applied two times a year. One half of the total requirement per tree should be applied at the start of the rainy season and the remaining half should be applied toward the end of the rainy season.
On established trees, fertilizer should be dug with a depth of 1-10 cm. The fertilizer is then distributed equally. Cover the holes/canal properly with soil to prevent the fertilizer from evaporating or from being washed out by heavy rains.
Water Management
Irrigation is needed during the first dry season. Unlike in the subsequent years, when the root system has already been established and have reached the layer with sufficient moisture. For better yield, it is advisable to irrigate the field regularly especially during summer.
Pest Management
Major Pests
Twig Borer (Niphonoclea albata N. /N. capito P.)
This insect pest are common during the dry season. The adult beetle girdles the small branches causing them to dry up or break and drop to the ground. Its creamish larvae bore into the pith of the branches. As they feed, they move downward until they pupate. All affected twigs and small branches may eventually die.
Control Measure: Remove or collect all affected twig as well as dried twigs on the ground. Dispose them properly by burning before applying chemical sprays. In using spray chemicals, mix 3-5 tbsp of Malathion, Carbaryl and/or Methyl Parathion per 5 gallons of water. Repeat application at 7-10 days interval when necessary.
Mealybugs (Gray Mealybugs - F. vigata) and Thrips (Red-banded thrips - Selen othrips rubrocintus Glard)
These pests sucks the sap of young leaves and shoots. When severe infestation occurs, the tree is weakened and the leaves and fruit may fall prematurely.
Control Measures: Spray trees with any insecticide commonly available at manufacturer's recommended dosage when there are signs of early infestation.
Leaf Miner (Acrocercops syngramma M.) - Young plants in the nursery and in the orchard are more affected by these pests. Caterpillars of this silvery gray moth mine through the tender leaves, thus, severely damaging them.
Control Measures: Spray 0.05% Phosphamidon at manufacturer's recommended dosage as soon as infestation is detected on new leaves.
Tea Mosquito (Helopeltis Antonil S.) - A reddish-brown mirid bug which normally appears at the time of emergence of new growth and panicles. Nymphs and adults suck the sap from tender nuts.
Control Measures: Spray Malathion, Phosphamidon and/or Endosulfan at emergence of new growth and inflorescence. A third spray may be done at the time of fruit setting to reduce immature fruit drops.
Saw-Toothed Grain Beetle (Cryzaephillus surinamensis L.) - This pest is known to attack the nuts during storage.
Control Measures: Nuts should be thoroughly dried and placed in air tight containers. Surface treatment is recommended. For finished products, fumigation is recommended.
Slug Caterpillar (Lamantridae spp.) - The caterpillar feeds on the leaves causing semi-defoliation.
Termite - Termites attack the roots and the trunk of cashew trees. They burrow on the bark of roots and branches especially of old trees. They build their soil mounds or nest on dead parts of the tree.
Control Measures: Soil mounds must be destroyed to locate the queen termite. The queen should be killed either mechanically or by spraying with 2% Chlordane. Chlordane should not be applied on living parts of the tree because of its long residual effect. Cistin powder could be applied to any part of the tree infested with termites at the rate recommended by the manufacturer.
Major Diseases
Dieback or Pink Disease - This disease is caused by fungus Corticium salmonicolor B. that usually occurs during the rainy season. Affected shoots initially show white patches on the bark; a film of silky thread or mycelium develops. Later, the fungus develops a pinkish growth which are the spores that make the bark split and peel off. Affected shoots start drying up from the tip.
Control Measures: All possible sources of innoculum should be removed. Affected shoots are pruned and burned. Cut surfaces must be protected by applying Bordeaux moisture paste. The tree should also be sprayed with fungicide at manufacturer's recommended dosage.
Anthracnose - This disease is cause by fungus Collectorichum gloeospoides that usually infect tender leaves, shoots, inflourescences, young fruits (apples) and young nuts. This disease is most prevalent when there is excessive rainfall coinciding with the appearance of new growth and flowering. Infected parts in its early stage show shiny, watersoaked lesions which later turn reddish-brown. At the lesion site, resinous exudation can be seen. As the disease progresses, the lesions enlarge in size, all affected tender leaves wrinkle, and the young apples and nuts become shrivelled. Inflorescences become black.
Control Measures: Remove all infected parts (source of innoculum) before spraying the tree with fungicide at manufacturer's recommended dosage of application.
Damping-off - This disease is caused by fungus Fusarium. This disease normally occurs in the nursery and effects cashew seedlings especially when the soil medium gets too wet.
Control Measures: Seeds for planting should be treated with Arasan 75 at the rate of ¼ tsp per ganta of seeds before sowing. Soil media for potting should be treated with soil fumingants.
Harvest Management
In the Philippines, cashew trees flower from November to March, while the harvest season is from February to May and may extend up to early June. The quality of nuts and yield is dependent on weather conditions during the fruiting stage. If it rains during the reproductive phase, poor quality nuts are produced. Fruits are usually harvested manually, although a number of farmers wait for the fruits to drop as the main concern of farmers is the nut. Nuts are picked from the ground, separated from the cashew apple, cleaned and dried.
In places where cashew apples are processed into juice, wine and other delicacies, fruits are harvested using a pole with a wire hook attached to its end. The pole is provided with a shallow net or cloth bag to catch the detached fruits.
Processing and Utilization
Nuts are roasted and eaten. At present, the only commercial scale use for the cashew apple is for livestock feed. However, the cashew apple is now being processed into juice, candy, wine, jam, etc. but only to a certain extent since the market for these end products is still in the development stage.
Sources of Cashew Planting materials
Palawan Seed Farm
Puerto Princesa City
Bureau of Plant Industry Nursery
Visayas Avenue, Quezon City
Guimaras Seed Farm
Jordan, Guimaras, Iloilo
Source: bar.gov.ph
↧
Mushroom Cultivation Using Rice Straw As a Culture Media

 Photo by Wendell Smith [/caption]
Effectiveness of the Technology
Mushroom production can generate a good income for farmers, and utilize surplus manpower in rural areas. The organic matter left over after mushrooms have been cropped on rice straw can be recycled onto cropland as organic fertilizer.
Explanation of the Technology
Rice straw can be used as the main substrate for mushroom cultivation. First, it should be composted. To improve the nutrient content, materials such as chicken manure, rice bran, urea, and gypsum may be mixed with the straw. For each ton of dry rice straw, growers can add 100 kg of chicken manure, 50 kg of rice bran, 12 - 15 kg of urea, and 10 kg of gypsum. The rice straw is prepared by composting.
Outdoor Composting
Pre-Wetting
Dry rice straw is cut to a length of 10 - 20 cm, and soaked with water (for 2 - 3 days in spring, six months after the straw has been cut, and 1-2 days in autumn, immediately after the rice harvest).
Stacking and Turning
The compost must be stacked and left to mature for 15 - 20 days in autumn, and 20 -25 days in spring. During this time, the compost must be kept moist and turned repeatedly.
The purpose of turning the compost is to make sure that the materials are thoroughly mixed, and that there is an even moisture content throughout the stack. Turning also helps regulate the temperature. When the temperature in the center of the stack rises to more than 70oC, the compost should be turned.
Indoor Mushroom Beds
Usually, the culture bed is filled with about 110 kg of compost per square meter.
Pasteurization and Conditioning
Once the compost has been put in the bed for mushroom production, it should be pasteurized by allowing the heat to rise to 58 - 60oC for 4 - 6 hours. Afterwards, the temperature should be kept at 48 - 55oC for 6 - 8 days, to allow the compost to mature.
Spawning of the Mushrooms
When you are ready to sow the mushroom spawn, the temperature of the compost should be reduced as quickly as possible, from 48 - 50oC to less than 25oC. The spawn needs to be spread in several layers. Thirty percent of the spawn should be spread on the bottom third of the compost, 30% of the spawn on the middle third of the compost, and 30% of the spawn on the top third of the compost. The final 10% of the spawn should be spread over the surface of the remaining compost. From an economic point of view, the optimum quantity of spawn is 2-3 kg (6 - 8 pounds) of spawn per 300 kg of compost.
After spawning, the temperature of the compost must be kept at 25 - 28oC. The humidity of the air should be around 90 - 95%. The bed will be completely filled with mycelium after 10 - 15 days.
Soil Preparation and Casing
A casing material to enclose the mushroom bed is prepared by mixing clay loam and peat at a rate of 8:2 (v/v). The optimal pH of the casing soil is 7.0 - 7.5.
To kill harmful mold and other microorganisms, casing soil should be sterilized by steaming it for 5 - 6 hours at 60 - 65oC, or 1 hour at 80oC.
The casing for the compost and spawn should be around 2.5 - 3.0 cm thick. After casing, the optimal temperature for mycelial growth is 25 - 28oC.
Caring for and Harvesting the Crop
It is very important to provide proper ventilation and water, and to maintain suitable levels of temperature and humidity for the mushrooms. At harvest, the air temperature should be maintained at 15 - 16oC.
Note: After all the mushrooms are picked, the mushroom-growing chamber and its contents should be sterilized with steam and then emptied, to prevent any pathogen from contaminating the next crop.
Cooperating agency for this topic:
National Institute of Agricultural Science and Technology (NIAST)
Rural Development Administration (RDA)
Suwon, Republic of Korea, 2002-03-01
Source: agnet.org
Photo by Wendell Smith [/caption]
Effectiveness of the Technology
Mushroom production can generate a good income for farmers, and utilize surplus manpower in rural areas. The organic matter left over after mushrooms have been cropped on rice straw can be recycled onto cropland as organic fertilizer.
Explanation of the Technology
Rice straw can be used as the main substrate for mushroom cultivation. First, it should be composted. To improve the nutrient content, materials such as chicken manure, rice bran, urea, and gypsum may be mixed with the straw. For each ton of dry rice straw, growers can add 100 kg of chicken manure, 50 kg of rice bran, 12 - 15 kg of urea, and 10 kg of gypsum. The rice straw is prepared by composting.
Outdoor Composting
Pre-Wetting
Dry rice straw is cut to a length of 10 - 20 cm, and soaked with water (for 2 - 3 days in spring, six months after the straw has been cut, and 1-2 days in autumn, immediately after the rice harvest).
Stacking and Turning
The compost must be stacked and left to mature for 15 - 20 days in autumn, and 20 -25 days in spring. During this time, the compost must be kept moist and turned repeatedly.
The purpose of turning the compost is to make sure that the materials are thoroughly mixed, and that there is an even moisture content throughout the stack. Turning also helps regulate the temperature. When the temperature in the center of the stack rises to more than 70oC, the compost should be turned.
Indoor Mushroom Beds
Usually, the culture bed is filled with about 110 kg of compost per square meter.
Pasteurization and Conditioning
Once the compost has been put in the bed for mushroom production, it should be pasteurized by allowing the heat to rise to 58 - 60oC for 4 - 6 hours. Afterwards, the temperature should be kept at 48 - 55oC for 6 - 8 days, to allow the compost to mature.
Spawning of the Mushrooms
When you are ready to sow the mushroom spawn, the temperature of the compost should be reduced as quickly as possible, from 48 - 50oC to less than 25oC. The spawn needs to be spread in several layers. Thirty percent of the spawn should be spread on the bottom third of the compost, 30% of the spawn on the middle third of the compost, and 30% of the spawn on the top third of the compost. The final 10% of the spawn should be spread over the surface of the remaining compost. From an economic point of view, the optimum quantity of spawn is 2-3 kg (6 - 8 pounds) of spawn per 300 kg of compost.
After spawning, the temperature of the compost must be kept at 25 - 28oC. The humidity of the air should be around 90 - 95%. The bed will be completely filled with mycelium after 10 - 15 days.
Soil Preparation and Casing
A casing material to enclose the mushroom bed is prepared by mixing clay loam and peat at a rate of 8:2 (v/v). The optimal pH of the casing soil is 7.0 - 7.5.
To kill harmful mold and other microorganisms, casing soil should be sterilized by steaming it for 5 - 6 hours at 60 - 65oC, or 1 hour at 80oC.
The casing for the compost and spawn should be around 2.5 - 3.0 cm thick. After casing, the optimal temperature for mycelial growth is 25 - 28oC.
Caring for and Harvesting the Crop
It is very important to provide proper ventilation and water, and to maintain suitable levels of temperature and humidity for the mushrooms. At harvest, the air temperature should be maintained at 15 - 16oC.
Note: After all the mushrooms are picked, the mushroom-growing chamber and its contents should be sterilized with steam and then emptied, to prevent any pathogen from contaminating the next crop.
Cooperating agency for this topic:
National Institute of Agricultural Science and Technology (NIAST)
Rural Development Administration (RDA)
Suwon, Republic of Korea, 2002-03-01
Source: agnet.org
↧
Baby Corn Production Guide

 Photo by quinn.anya [/caption]
Generally, corns farmers strive their competitive position by improving yields and cutting costs of production, for instance, through shortening cultural risks by harvesting for either green corn or baby corn. Young cob corn has a short growth thus a farmer can grow four or more crops a year. It has a wide range of adaptation and does not need intensive cultivation. Pollination is also not a problem because young cob corn is harvested before kernels are developed. Considering these factors, young cob corn has good potentials.
Varieties
Sweet corn varieties are commonly used for the production of baby corn. In some areas of the country, Pioneer 305 and SMC (hybrid) varieties are being commercially grown for young corn. Golden Cross Bantam and Supersweet were also found to possess the best attribute of young cob corn. (Yodpetch and Bautista, 1983). IPB Var 1, IPB Var 2, IES Cn 1, IES Var 2 and Supersweet corn # 33 were also proven to be suitable for young corn production (Masana et al., 1990).
Soil and Climatic Requirements
The best soil for corn is a well-drained with a texture of silt loam or loam type. It should be a type of a soil with a high moisture holding capacity, high amount of organic matter and be slightly acidic (pH 5.3 to 7.3). A rainfall of 200 to 1,500 mm is required in its growing period. However, the optimum requirement of corn is 400 to 600 mm per growing period. In time of moisture deficiency, irrigation is essential.
Land Preparations
A seedbed which is deep, well pulverized yet fairly compact is excellent for corn.
A clayey and weedy field requires more plowing. In a field where trash is plowed under, a second or third operation may be needed to obtain a clean seedbed.
Plowing is done when the field is at the right moisture, when the soil particles 13 cm. below the ground separate, only a thin portion sticks to the finger but no ball is formed.
For animal-drawn plow, a depth of 4 to 7 cm is sufficient. When tractor is used, 12 to 14 cm is preferable.
Harrowing is done at the time the soil has the right moisture content. It is done again within two days before planting to level the soil.
Planting Method
1. Surface or Flat-bed Planting
Seeds are drilled or hill-planted on a level to slightly rolling topography at a desired depth and row spacing. It is suited for areas with abundant precipitation and heavy soil types.
2. Listed Planting
Seeds are placed at the bottom of the V-shaped furrow. A lister, which is double moldboard blade, is used for opening furrow of this kind. It is practiced in areas where rainfall is a limiting factor, where soil drainage is good and the soil is friable.
3. Ridged Planting
The seeds are placed to a specific depth on top of the ridge. The conditions described in listed planting are also appropriate for this type.
If the soil contains considerable moisture at planting time, the seed should be planted from 2 to 5 cm. deep. On the dry, soil the seeds should be planted 5 to 8 cm. deep.
Rate of Seeding
The amount of seeds needed in a hectare to have a population density of 80,000 to 100,000 plants/hectare is 27 to 30 kg of hybrid seeds. The rows are spaced 100 cm with a hill spacing of 25 cm with 3 plants/hill or drilled 25 cm between hills. No thinning on corn seedlings will be done.
Irrigation
The field should be irrigated moderately even at the time of seed germination and during the early growth and development of corn plants. Weekly irrigation must be done especially during summer.
Fertilization
The recommended rate of fertilizer per hectare is 3 bags 14-14-14 and 1 bag Urea. One half of N and all of P and K is applied in the furrow and then cover 2 to 3 cm layer of soil before planting. Fertilization may also vary as recommended by the Bureau of Soils as a result of a soil analysis.
Weeding
Weeds are the unwanted plant companion of crops. Besides serving as hosts to plants pests and diseases, weeds can reduce corn yield by as much as 50 to 80 % if left uncontrolled.
Weeds are commonly controlled by hand weeding, hoeing within the row and cultivation in between the rows.
Detasseling
Detasseling is achieved by removing all the tassels of corn plants. This is done as soon as the tassels emerge
Crop Protection
Baby corn requires practically no application of pesticides because the crop has short growth duration thereby eliminating the residue factor and minimizing in production cost.
Harvesting
Timelines is the most important consideration in harvesting baby corn. Ideally, young corn is harvested 2 to 3 days after silking or 50 to 55 days after emergence. Harvesting duration may lasts for 15 to 18 days, which is carried on by, hand picking.
Cobs for market must have a good quality. Young cob corn of excellent quality is straight, has uniform ovary alignment, is 4 to 11 cm. long, 0.8 to 1.8 cm. in diameter, slightly yellow to yellow color, sweet and not fibrous (Yodpetch and Bautista). Cobs must be free from bites of corn borer, must be clean and not broken
References
Interview with Mr. Benny Cadiz
Masana et al. Preliminary Test Evaluation of Baby Corn. 1990
Masana et. al. Baby Corn Production Technology. 1993
Philippine Agriculturist 66:232-244. July-September, 1983
Philippine Agriculturist 67:122-134. June 1094
Report 33rd Meeting of the Philippine Seedboard, Bureau of Plant Industry
The Philippine Recommends for Corn. !981. PCARRD, Los Baños, Laguna
Lolita F. Masana
Agriculturist II, Bureau of Plant Industry
Source: bpi.da.gov.ph
Photo by quinn.anya [/caption]
Generally, corns farmers strive their competitive position by improving yields and cutting costs of production, for instance, through shortening cultural risks by harvesting for either green corn or baby corn. Young cob corn has a short growth thus a farmer can grow four or more crops a year. It has a wide range of adaptation and does not need intensive cultivation. Pollination is also not a problem because young cob corn is harvested before kernels are developed. Considering these factors, young cob corn has good potentials.
Varieties
Sweet corn varieties are commonly used for the production of baby corn. In some areas of the country, Pioneer 305 and SMC (hybrid) varieties are being commercially grown for young corn. Golden Cross Bantam and Supersweet were also found to possess the best attribute of young cob corn. (Yodpetch and Bautista, 1983). IPB Var 1, IPB Var 2, IES Cn 1, IES Var 2 and Supersweet corn # 33 were also proven to be suitable for young corn production (Masana et al., 1990).
Soil and Climatic Requirements
The best soil for corn is a well-drained with a texture of silt loam or loam type. It should be a type of a soil with a high moisture holding capacity, high amount of organic matter and be slightly acidic (pH 5.3 to 7.3). A rainfall of 200 to 1,500 mm is required in its growing period. However, the optimum requirement of corn is 400 to 600 mm per growing period. In time of moisture deficiency, irrigation is essential.
Land Preparations
A seedbed which is deep, well pulverized yet fairly compact is excellent for corn.
A clayey and weedy field requires more plowing. In a field where trash is plowed under, a second or third operation may be needed to obtain a clean seedbed.
Plowing is done when the field is at the right moisture, when the soil particles 13 cm. below the ground separate, only a thin portion sticks to the finger but no ball is formed.
For animal-drawn plow, a depth of 4 to 7 cm is sufficient. When tractor is used, 12 to 14 cm is preferable.
Harrowing is done at the time the soil has the right moisture content. It is done again within two days before planting to level the soil.
Planting Method
1. Surface or Flat-bed Planting
Seeds are drilled or hill-planted on a level to slightly rolling topography at a desired depth and row spacing. It is suited for areas with abundant precipitation and heavy soil types.
2. Listed Planting
Seeds are placed at the bottom of the V-shaped furrow. A lister, which is double moldboard blade, is used for opening furrow of this kind. It is practiced in areas where rainfall is a limiting factor, where soil drainage is good and the soil is friable.
3. Ridged Planting
The seeds are placed to a specific depth on top of the ridge. The conditions described in listed planting are also appropriate for this type.
If the soil contains considerable moisture at planting time, the seed should be planted from 2 to 5 cm. deep. On the dry, soil the seeds should be planted 5 to 8 cm. deep.
Rate of Seeding
The amount of seeds needed in a hectare to have a population density of 80,000 to 100,000 plants/hectare is 27 to 30 kg of hybrid seeds. The rows are spaced 100 cm with a hill spacing of 25 cm with 3 plants/hill or drilled 25 cm between hills. No thinning on corn seedlings will be done.
Irrigation
The field should be irrigated moderately even at the time of seed germination and during the early growth and development of corn plants. Weekly irrigation must be done especially during summer.
Fertilization
The recommended rate of fertilizer per hectare is 3 bags 14-14-14 and 1 bag Urea. One half of N and all of P and K is applied in the furrow and then cover 2 to 3 cm layer of soil before planting. Fertilization may also vary as recommended by the Bureau of Soils as a result of a soil analysis.
Weeding
Weeds are the unwanted plant companion of crops. Besides serving as hosts to plants pests and diseases, weeds can reduce corn yield by as much as 50 to 80 % if left uncontrolled.
Weeds are commonly controlled by hand weeding, hoeing within the row and cultivation in between the rows.
Detasseling
Detasseling is achieved by removing all the tassels of corn plants. This is done as soon as the tassels emerge
Crop Protection
Baby corn requires practically no application of pesticides because the crop has short growth duration thereby eliminating the residue factor and minimizing in production cost.
Harvesting
Timelines is the most important consideration in harvesting baby corn. Ideally, young corn is harvested 2 to 3 days after silking or 50 to 55 days after emergence. Harvesting duration may lasts for 15 to 18 days, which is carried on by, hand picking.
Cobs for market must have a good quality. Young cob corn of excellent quality is straight, has uniform ovary alignment, is 4 to 11 cm. long, 0.8 to 1.8 cm. in diameter, slightly yellow to yellow color, sweet and not fibrous (Yodpetch and Bautista). Cobs must be free from bites of corn borer, must be clean and not broken
References
Interview with Mr. Benny Cadiz
Masana et al. Preliminary Test Evaluation of Baby Corn. 1990
Masana et. al. Baby Corn Production Technology. 1993
Philippine Agriculturist 66:232-244. July-September, 1983
Philippine Agriculturist 67:122-134. June 1094
Report 33rd Meeting of the Philippine Seedboard, Bureau of Plant Industry
The Philippine Recommends for Corn. !981. PCARRD, Los Baños, Laguna
Lolita F. Masana
Agriculturist II, Bureau of Plant Industry
Source: bpi.da.gov.ph
↧